
Notifications
Clear all

Topic starter
January 9, 2026 10:02 pm
Insulation Installation: Completed except for attic access, door panels and trim.


Topic starter
March 15, 2026 10:19 pm
Multi-Camera Security Equipment & Configuration;
I have been asked by another forum member to post information about the equipment I am using for multi-camera security. I will start this off by posting a list of items (mostly from amazon). This is not sponsored by anyone or anything. This is just one geeks opinion and experience on my little plot of heaven. I suggest you do your own research and decide what works best in your situation. However, it is my hope that this will at least get you started.
This is for the three external HiRes 36x zoom: To make sure I have the best chance of having enough power at my destinations, I kick things off by starting each run starting from the Netgear POE switch with 180w available (although i only use non-poe connections to connect the network to each of the (3) 90w injectors).

I am using a LINOVISION PoE 90w Power Injector to power each pair of cameras and wifi extenders.

At the terminal end I am using the LINOVISION 90w input 30w/60w output splitter The 60w to the camera and 30w to Wifi extender.

I have 3 wifi extenders to cover the 4 acres (I will probably install a 4th when i bury the propane tank on the other side of the property).

I have 3 long range POE+ 8mp PTZ cameras

For my longest run of 800 feet I the LINOVISION extender in the long-range configuration.

All of the cable was run through Pex tubing and stapled to the ground so the grass could grow over it. The folks cutting the lawn every two week only cut to a height of 4 in in spring and 6 in in summer so I should be safe even from the helper and the weed eater (yes, i had to cut the connector off and I needed help with the push pull, to feed it through).

I obviously had to connect several lengths of cat-6 cable (don't try the length with cat-5 signal loss at 1000 feet will kill you). I used these. they cannot be buried or submerged for very long (more than a couple of seconds, like pouring a bucket of water, from a hose, etc), but they do just fine during rain, sleet & snow.


Topic starter
March 15, 2026 10:27 pm
Another alternative to the Netgear switch is the LINOVISION POE++

Topic starter
April 12, 2026 6:31 pm
Nature ALWAYS wins! We just THINK we have game! (The proof is in! and it ain't pretty.)
The short version: Don't believe the IP ratings of ANY product, especially if that product is related in any way to electricity!
The truth is is out there ... and it's costly! lesson RE-learned.
Lets just get the ugly part over with (see damage photos).
.
These little cuties are the WiFi extender and the PoE converter for one of the PTZ cameras (which survived).


This is the PoE range extender

We had a storm blow through parker county last week and dump a couple of inches of rain in a VERY short time. As you have probably guessed by now; I lost, Nature won. I forgot the basic principals of electricity I learned at Millington NAS 50 years ago. DON'T MIX WATER AND ELECTRICITY. period end of story.
After taking advantage of all of my amazon insurance; I decided to do, what i should have done in the first place. At each junction mount the box below to the fence post with u-brackets and call it a day.

The OEM seals, etc might work, but after a lot of research and buying several different types of "waterproof" connectors, I found that the problem seems to be improper fitting of the back seal. The quality of the seal depends on whether or not water can "wick" up the back side into the connecter. This seems to be what is happening to me.
The primary seal appears to hold; the rear seals do not. The other issue with the back seals has to do with the coating on the wire. If the wire "twist" or "strands" can be seen, you are probably using indoor instead of outdoor wiring and won't get a good seal. I have found for the best seal to use "ground burial" quality cable. It has a very thick outer covering, but it cost more.
btw, the same problem occurs if there is an excessive "pattern" to the surface of whatever cable you use. I even found some buried cable online, but it had ridges in the coating for some reason.
Cameras are all good and I only lost one WiFi extender, one PoE booster and a handful of junctions (most covered by insurance).
For those who are thinking of just "waterproofing" the connector .... great idea, bad outcome! its waterproof, forever! AND ugly as sin. Obviously there is no repairing this.


Not sustainable, I cut it out, reinstalled RJ-45 ends with a regular junction and installed a box as indicated above.

Topic starter
May 3, 2026 8:51 pm
Clean up time! What a mess!
All six cameras have been installed as have the 3 wifi Range Extenders.
So now it is time to deal with my rats nest of cables

I purchased a 16x20 cabinet and drilled 11 1-inch holes in it using a 1 inch hole saw then line each hole with a rubber grommet.
I still need to move all three PoE modems to the left (move the board) and take some stress off of a couple of cables. The interior of the cabinet is going to need some serious organization.


This post was modified 6 months ago 2 times by dfwtinker
Topic starter
June 27, 2026 5:26 am
Well S*it fire Batman! That Really SUX!
24k Mini-Split has a heart-attack!
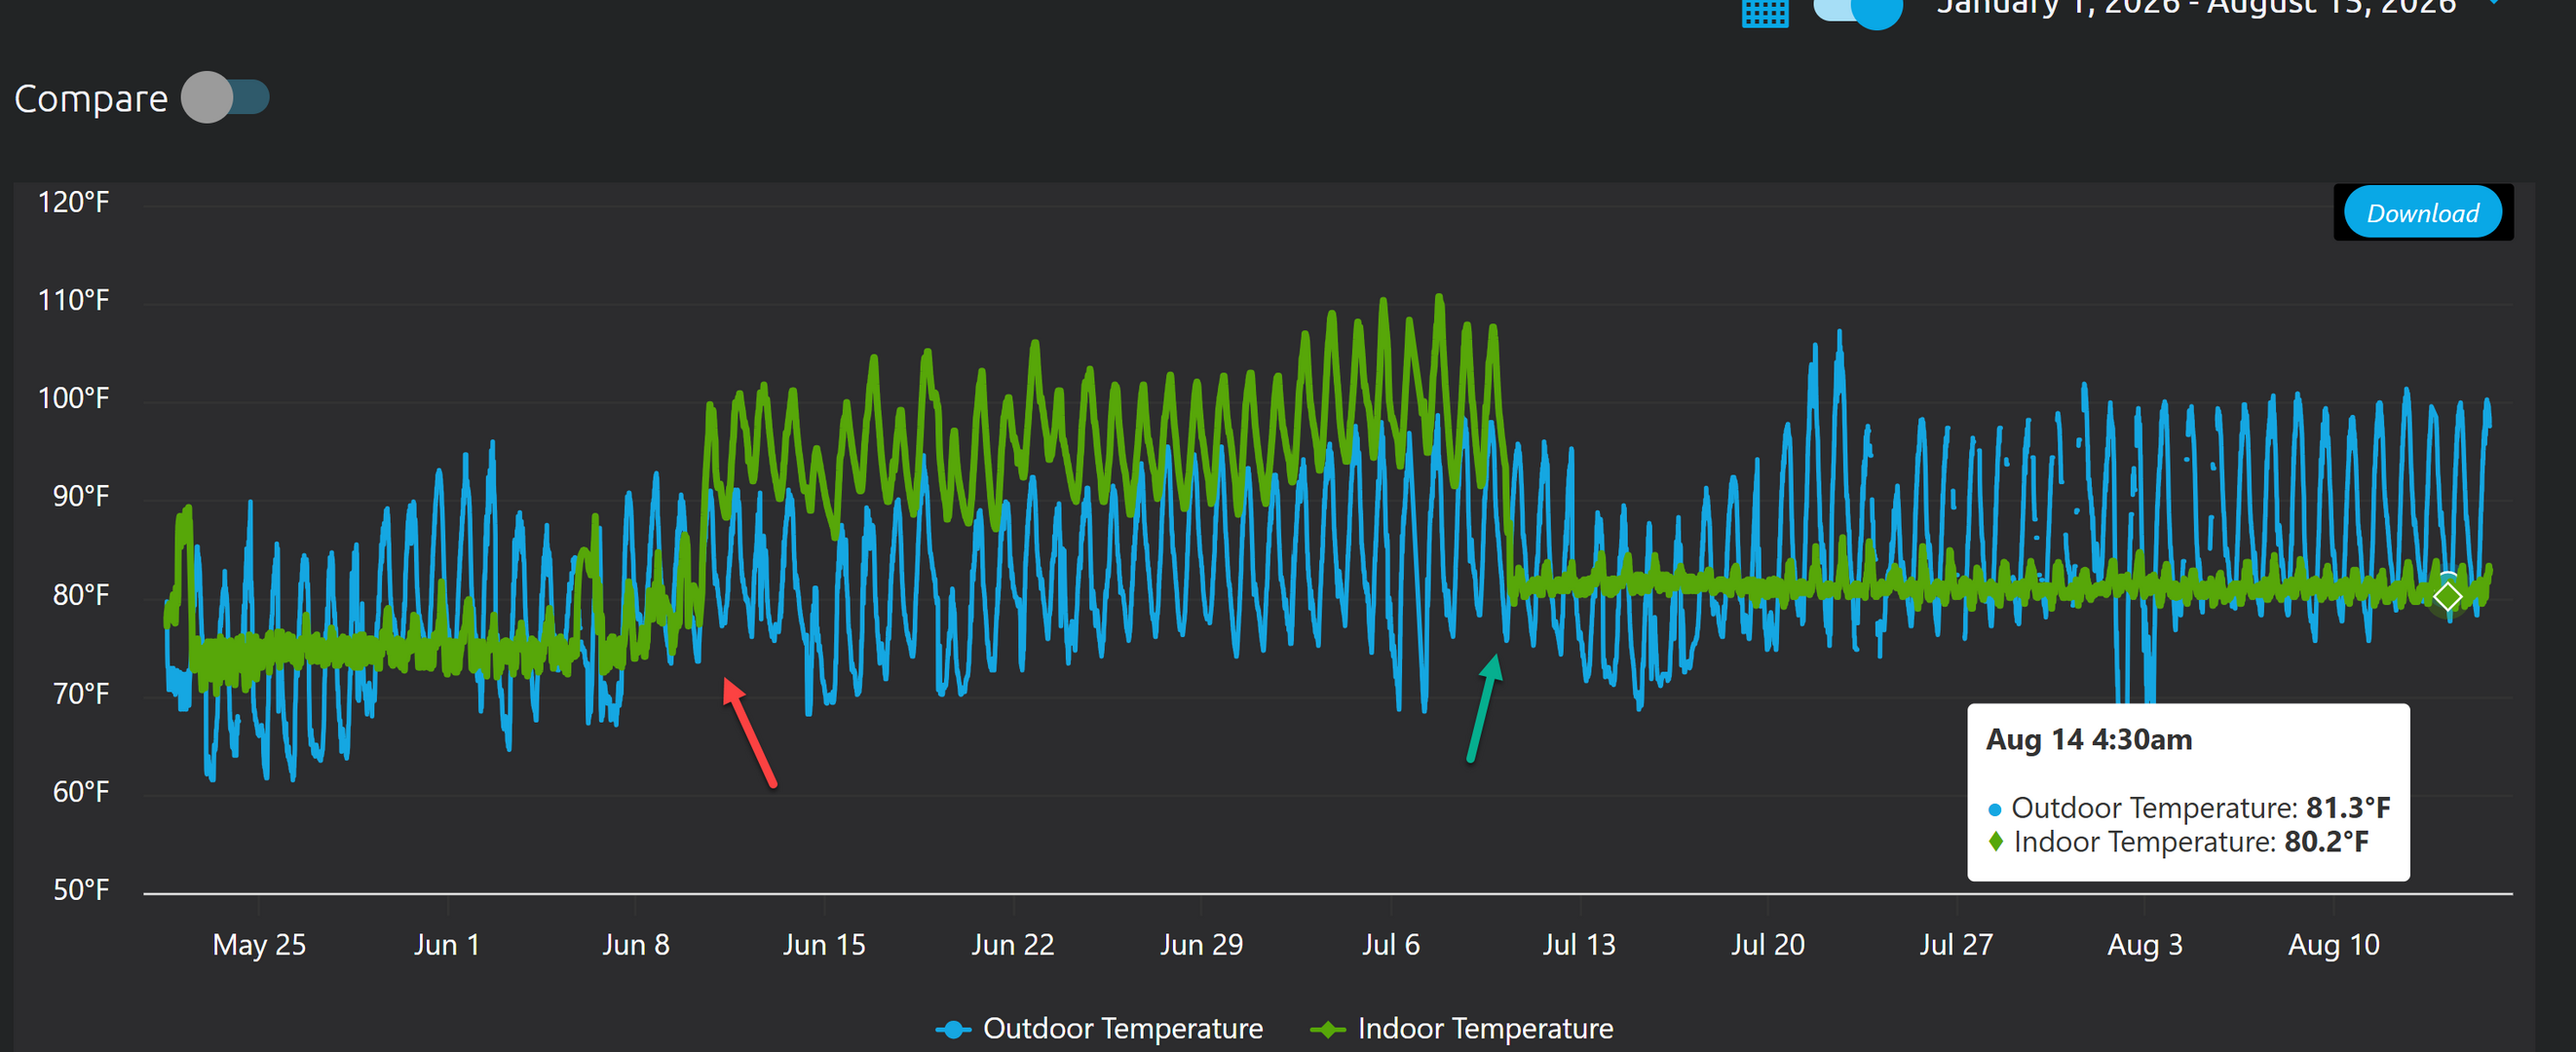
Of course I was out of town when it all went down. You can clearly see the point of failure from the charting of my indoor temps at my home and at the property pump-house (blue).

The cause of the shutdown of the 6000xp was that it ran out of battery power. Three cloudy days in a row prevented recharging. 4 hours later when charging allowed the 6000xp to restart; everything came back on except the cool air (interior and exterior units came on, but the compressor never kicked in.

I ran the usual test to determine if I had lost 240v from the inverter. I had not, the well pump was still running. I performed the hard reset; by turning off both units and then unplugging from the inverter, in order to break any lingering connections to fade and logic lockouts to reset. I let the unit set for an hour before plugging it back in and powering it back on. It was quickly very clear that the logic was working but there was no heartbeat from the compressor. (sorry, i tried making the video smaller, obviously failed)
Enter stage left; Ethan Kline Signature Solar Engineer; Support Ticket #194632
We quickly went through his troubleshooting list and checked off all of the to-do’s and what if’s in fairly quick order.

There was a bit more back and forth:

I did not have a working voltmeter and had to order a new one from Amazon (fluke 17B) and it was going to take a couple of days. However Ethan stepped up and continued to move the troubleshooting forward.

I don’t know about you, but I don’t often get escalation without a lot of BS, however, Ethan prevailed.

Thank you Ethan for the professional & personal Customer Service you provided. I would also like to thank all of the folks at Signature Solar who have demonstrated their commitment to Customer Service during the 3 years I have been doing business with them.
Tomorrow; the EG4 portion of this “event”. The escalation!
This post was modified 4 months ago 3 times by dfwtinker
Topic starter
July 11, 2026 9:11 pm
Credit where credit is due!
I have been advised by other members that I committed a major faux pas in my last post!
It seems that in order for me to properly call attention to call out of [email protected] in this post via his user name; @ethansolar and make sure his management team receives notice; is to put the "@" sign in front of his user name. This just goes to show that an old dog CAN learn new tricks (I hope I got it right this time.)
If I still have it wrong, I'm sure someone will let me know.
Thanks again Ethan.
Topic starter
July 11, 2026 9:47 pm
EG4 Takes Charge!
It took me a while longer to get this next post together than I planned. Life has it's demands.
Later on the 16th; about 2 hours after my last conversation with Ethan, I received a call from an engineer at EG4. We went over a couple of more troubleshooting items & I emailed back some requested metrics. On June 26th I received an email from EG4.


Fast-forward to July 3rd
The new unit arrived! I loaded it into the car and took it out to the property. Since it is already over 100 degrees during the day, I decided to wait until I could get some help.

I hired my nephew and had him meet me at 0630 in the morning to get the units switched out (temp was already 82 degrees). We finished the change out in exactly 3 hours (temp was just crossing 95! time to go!). HVAC guy wanted $1000 to help, nephew cost me a case of beer & a McD's Sausage biscuit; AND he did most of the work! Thanks Nick!


Everything seems to be working just fine. It has been holding at 80 degrees for 24 hours.

Autopsy/postmortem report to follow!
This post was modified 3 months ago 2 times by dfwtinker
Topic starter
August 17, 2026 12:38 am
24K Failure Autopsy/postmortem
I know I said 6 weeks ago that I would post the autopsy of failure of my 24k mini-split. However life has a way of laughing when you make plans.
I’ll get right to it!
The failure appears to have been caused by a failed brass coupling on one of the refrigerant lines. In close-ups you can clearly see the signs of a bad casting. The texture is rough and brittle looking.
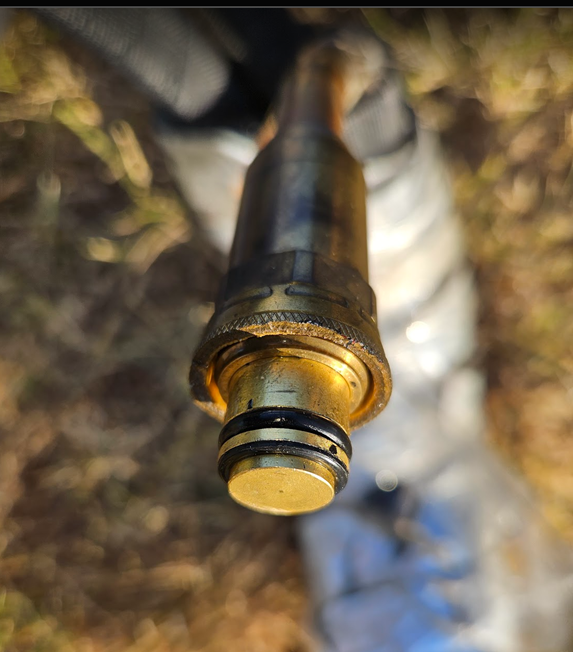
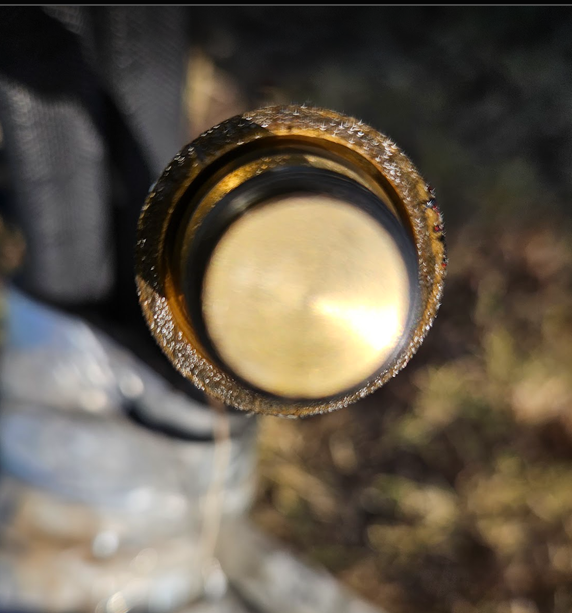
The failure is obviously due to poor quality/workmanship at the time of manufacturing. Even with quality control; "stuff" still happens, that is what RMA's are for.
I only found this as I was removing the old outside unit and replacing it with the one I received from EG4 as a warranty repair. None of the test we ran even considered a loss of coolant!
Thank You EG4 for standing behind your product! In all honesty I must admit that based on what I have read recently on the EG4 forums; had it been discovered that the coupling had failed BEFORE replacement; they (EG4) would NOT have approved the RMA honoring the warranty and replaced the unit. I don't say this to slam EG4 in any way. To the contrary! I toot their horn, whenever I am in conversations regarding solar equipment, etc.
To support my opinion I simply point to another member of the community that had a similar situation and the UNIT RMA was denied. They did however send a new line-set.
However; as I state below, a pro wanted to charge me $1000 to bleed and refill the new lines-set and the compressor.
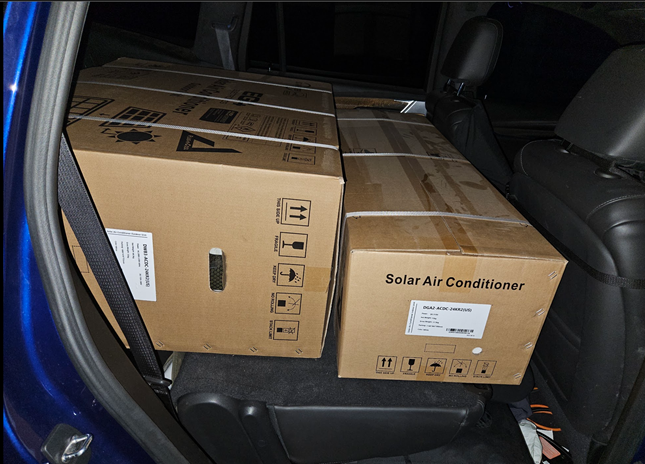
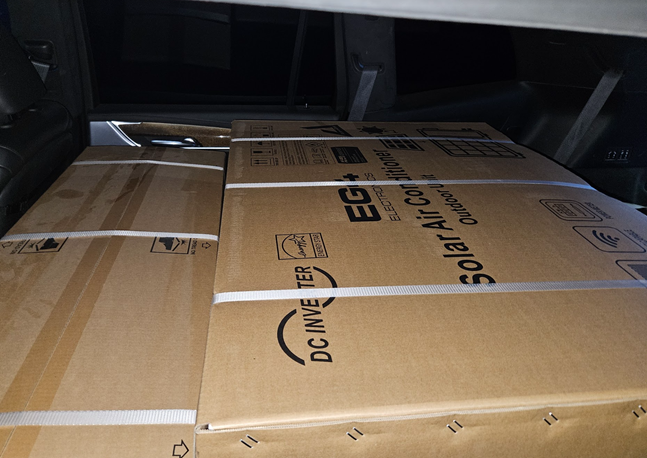
The repair/replacement began around 0630 (while it was still cool outside) and completed in just under 3 hours with both of us doing the work. Not happening... That is almost as much as the entire unit cost me brand new! WTF!

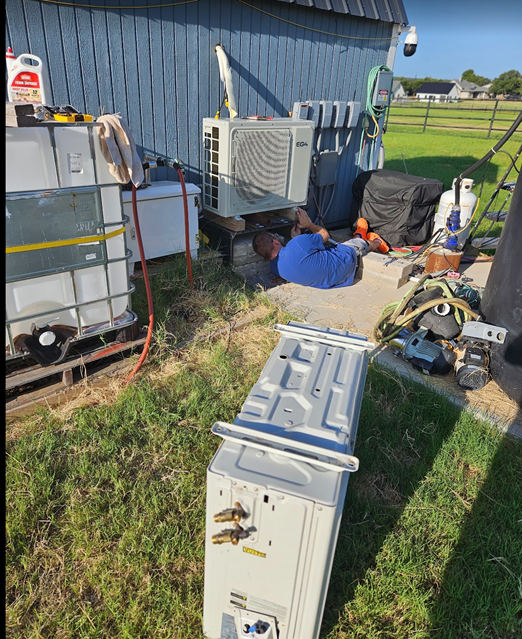
The cost for the assistance was certainly much, much less than the $1000 I was quoted for just recharging the system after I replaced the outside unit. That wasn’t happening. 3 hours, a case of beer, gas money and $100 cash. All Good!
This post was modified 2 months ago 3 times by dfwtinker
Topic starter
September 17, 2026 9:47 pm
What I did on my summer vacation …
“First I woke up. Then I went downtown. To look for a job …”
{ Insert record scratch here. } No, no, no this is not a Cheech & Chong flashback….
I’ve spent so much time writing about the “stuff” I was doing and not showing the recipients of all of that love and work!
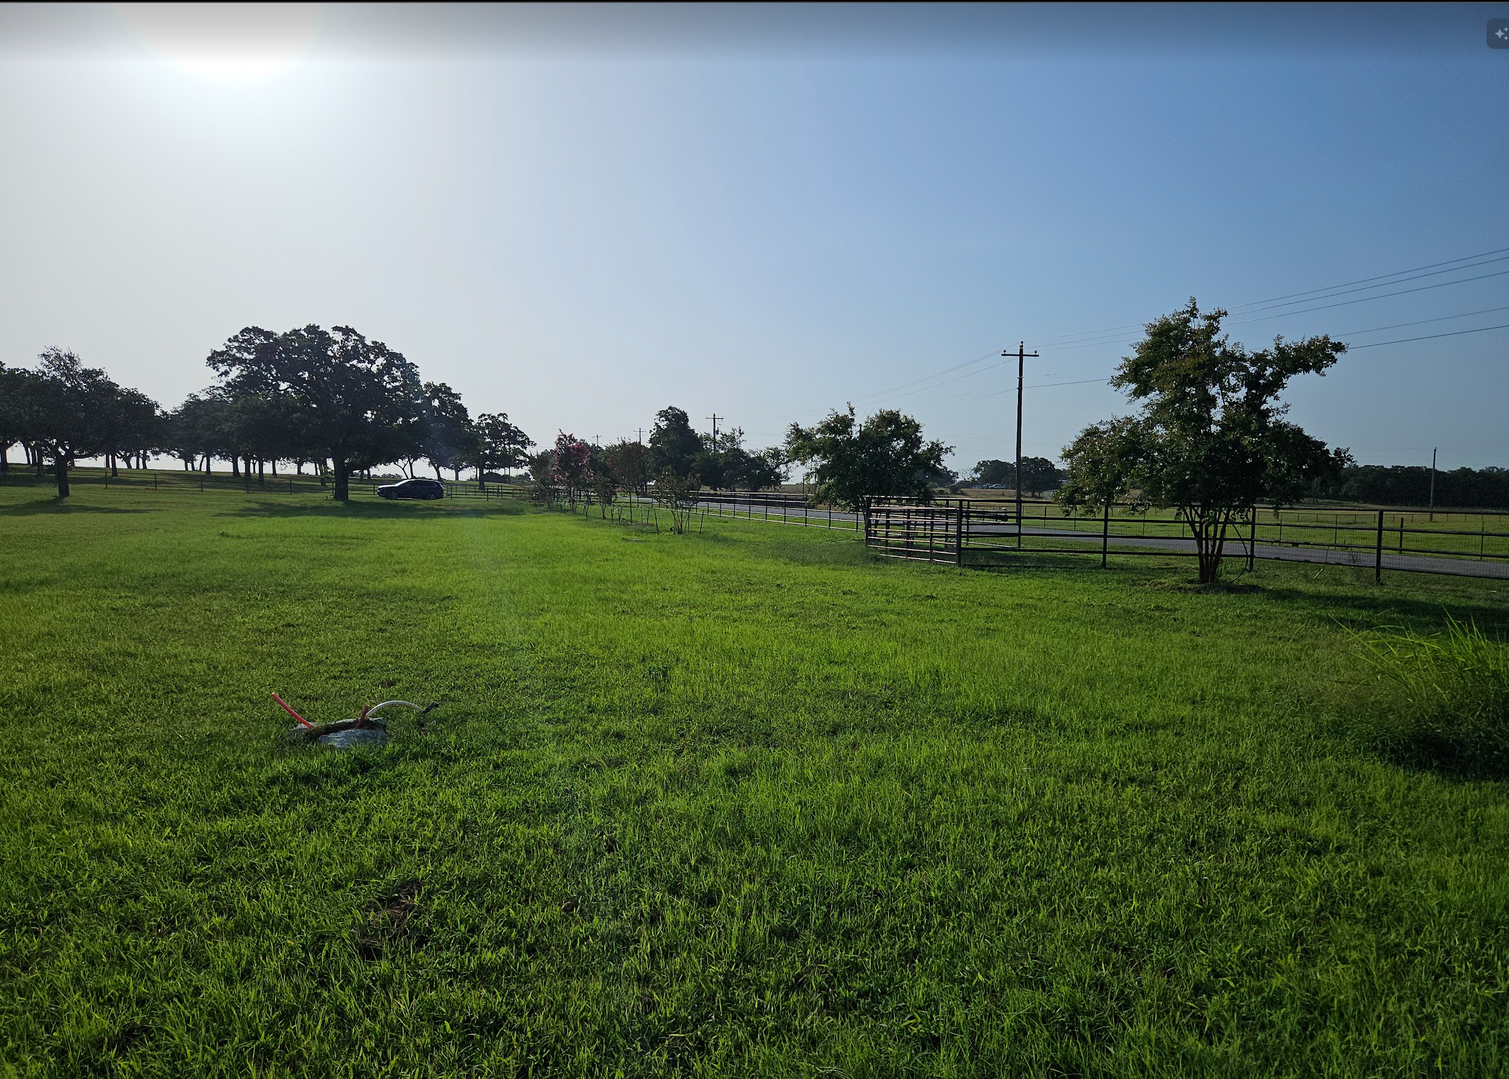
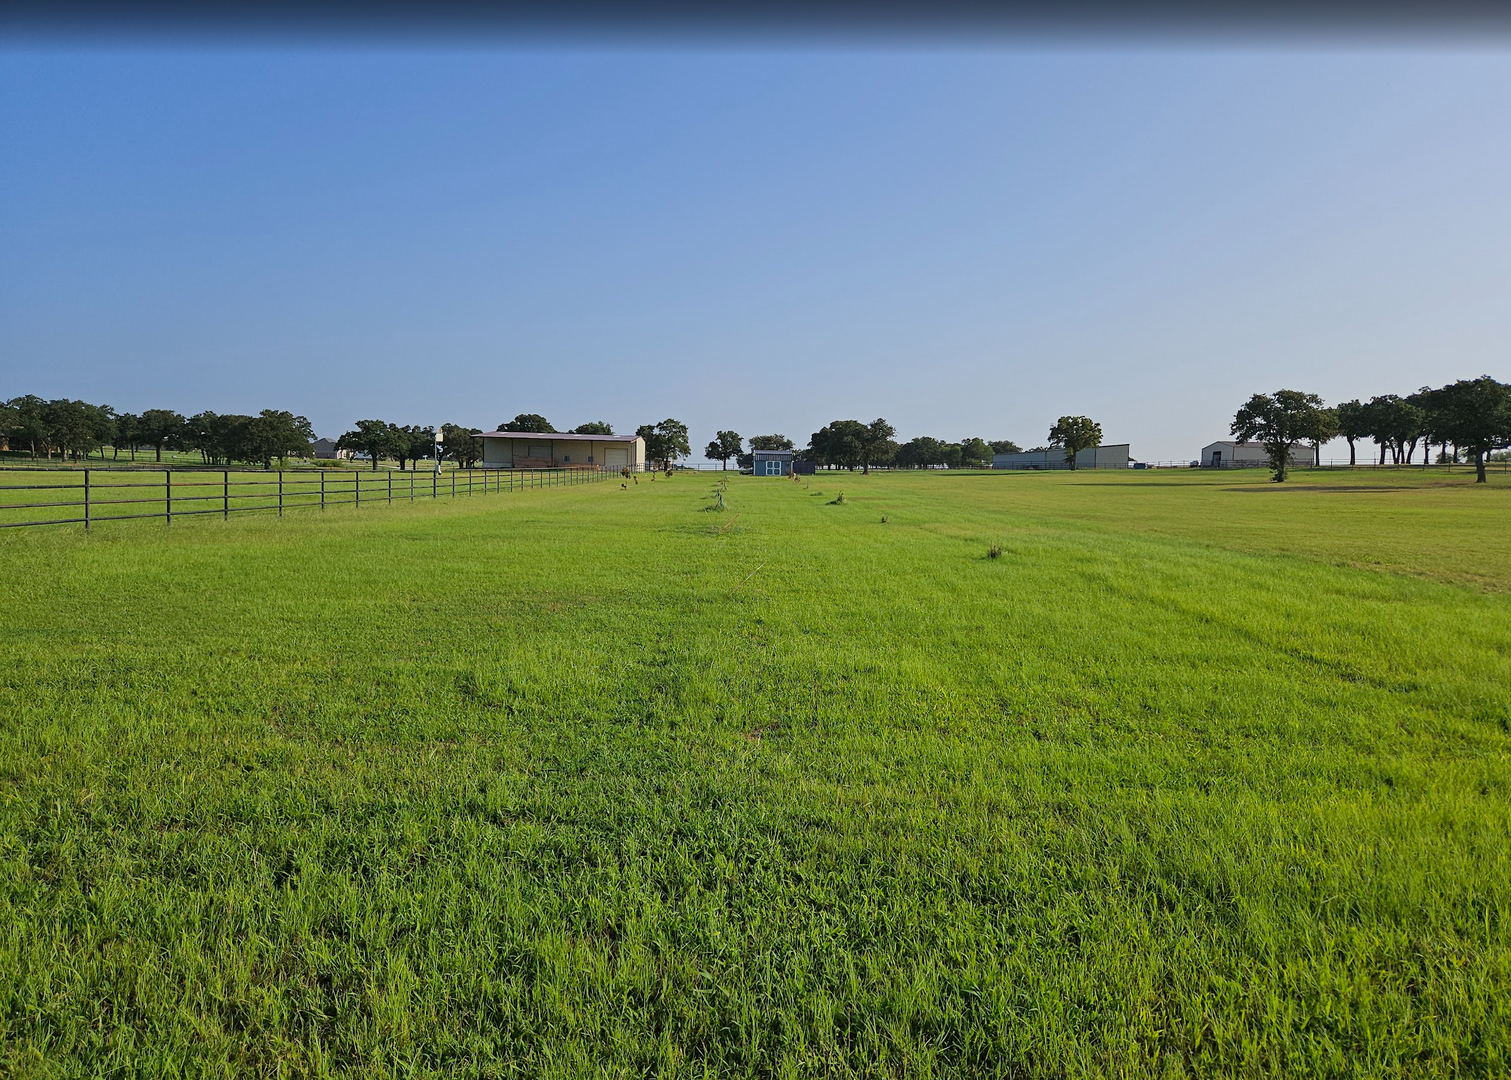
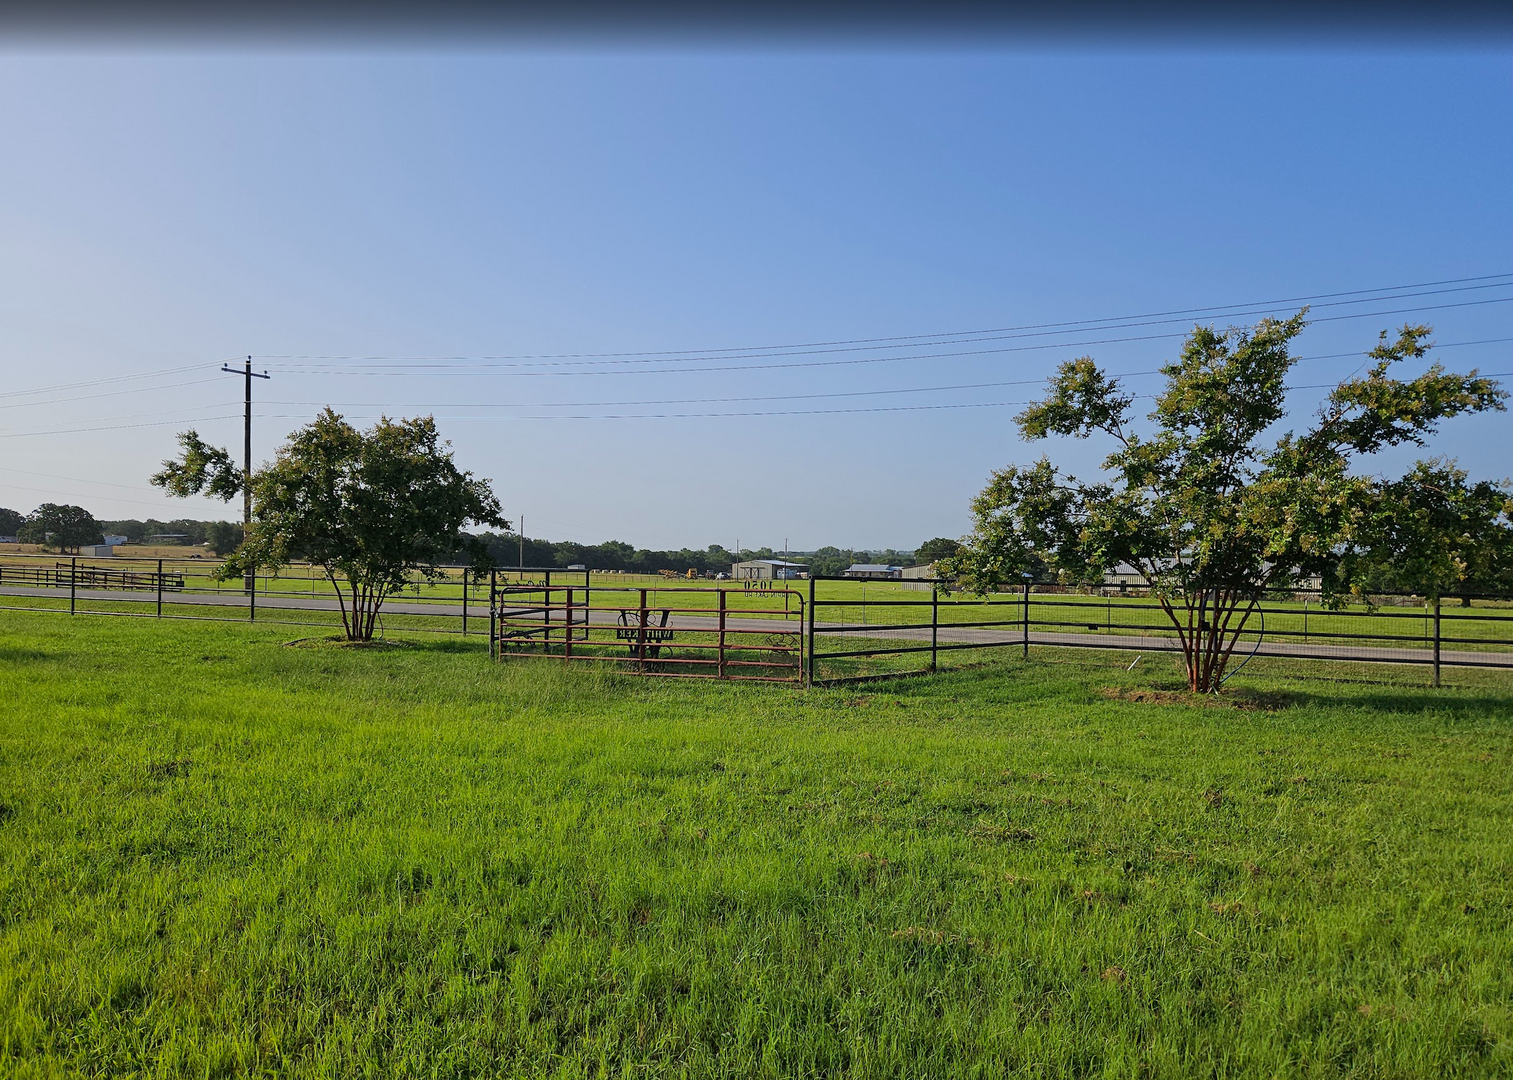
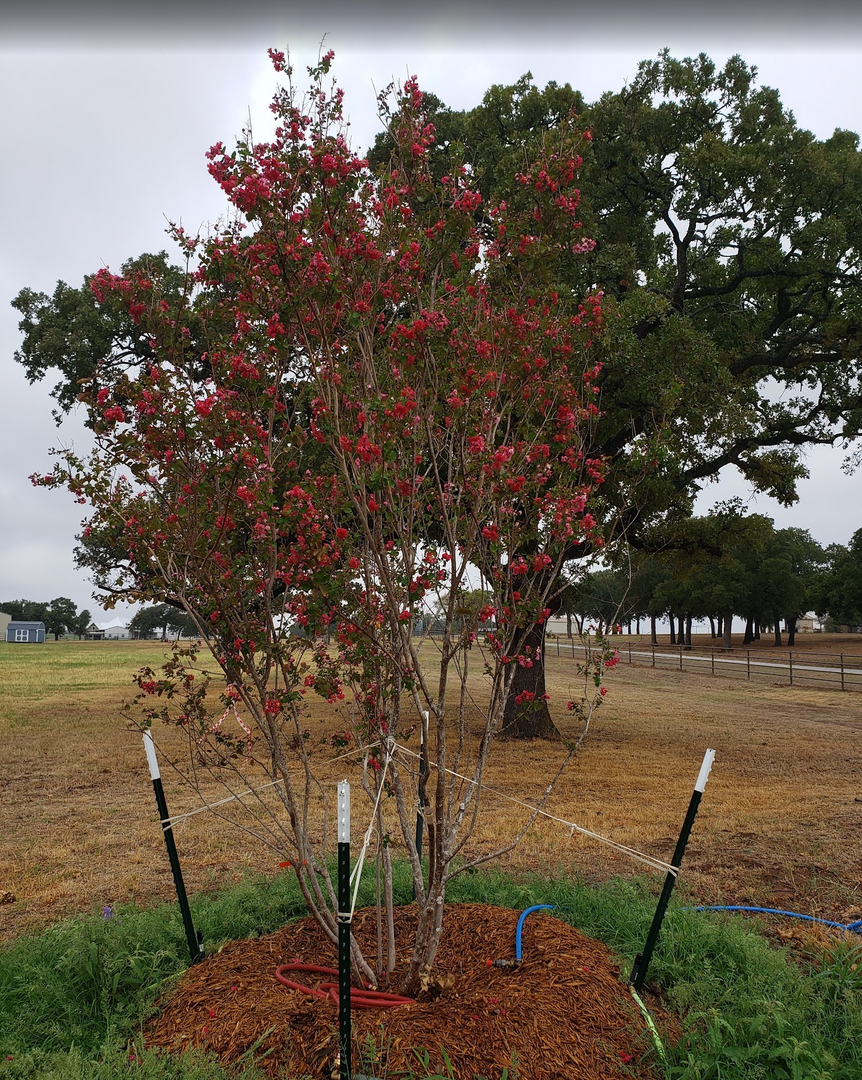
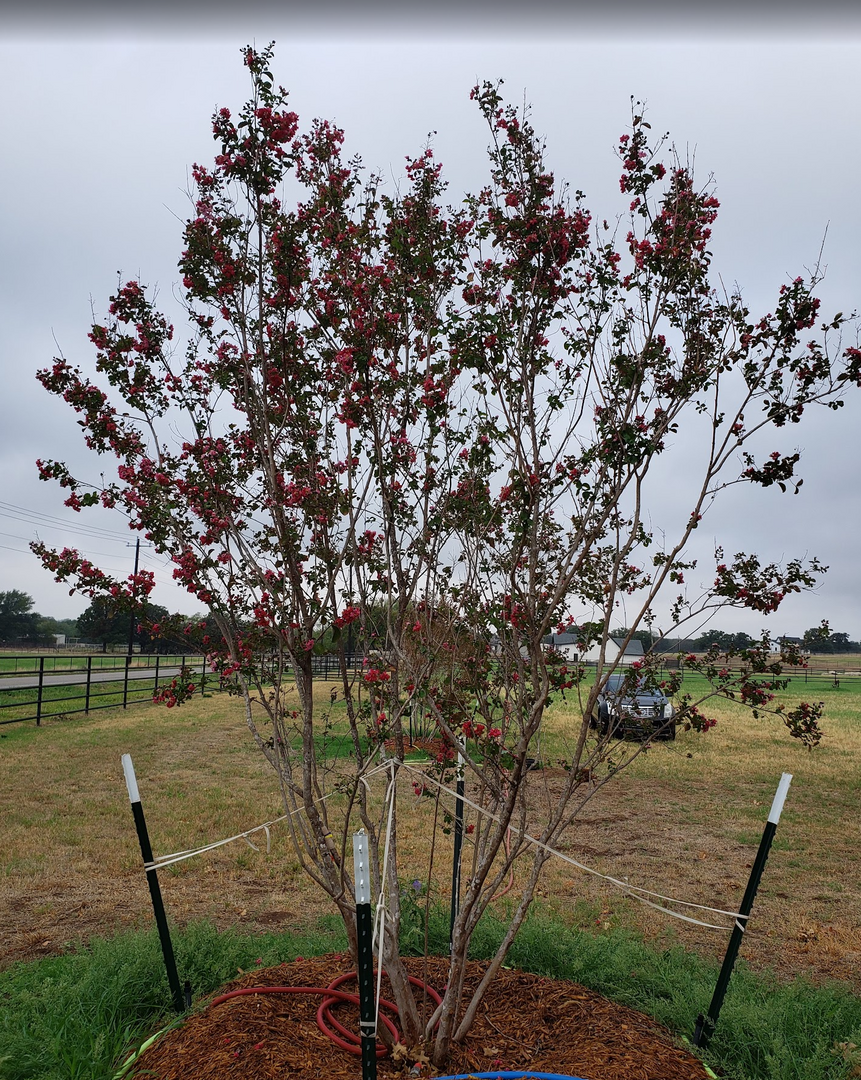
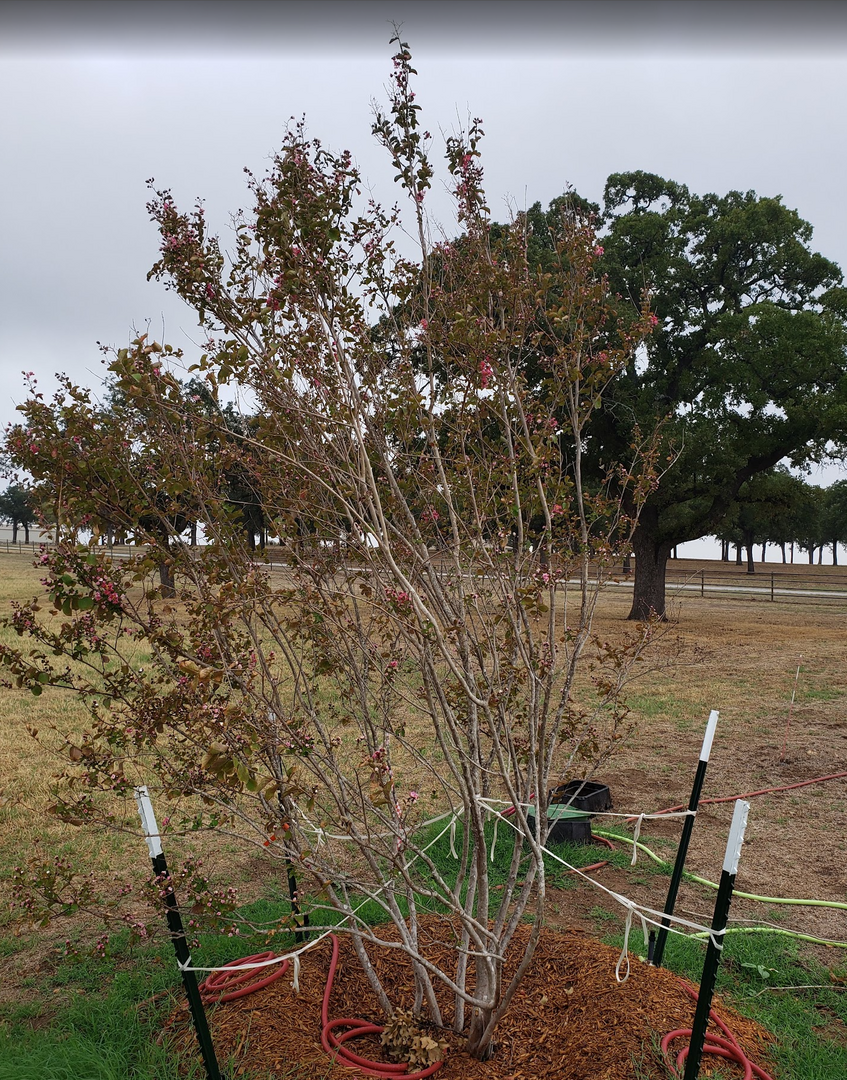
First this year was the planting of three replacement trees for first batch of 95 gallon Crapes I planted and MURDERED three years ago. I was told to water 3 times a week. However there was no mention of How MUCH water, or for how late into the growing season to continue watering. I stopped watering at first freeze around mid-December; and did not water again until mid-Feb when received our first 50 degree day. FAIL!! Now they are surviving "shrubs"; if they make it!
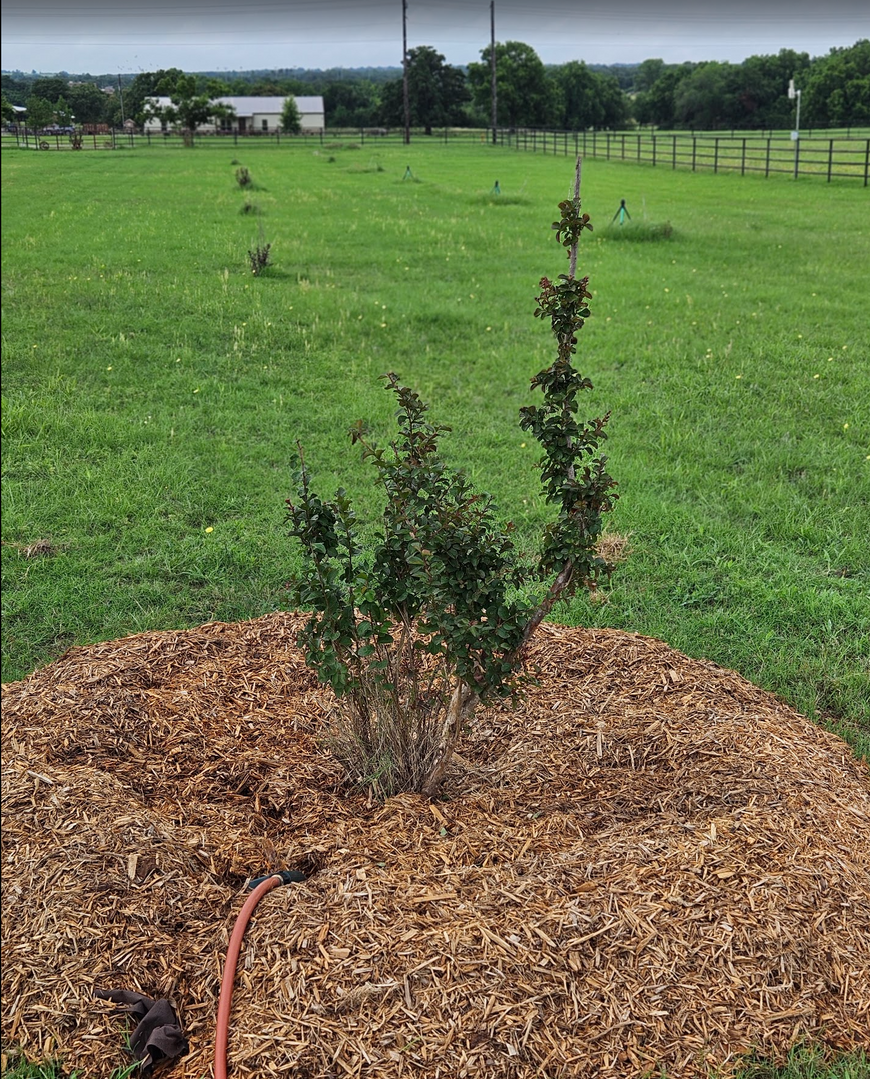
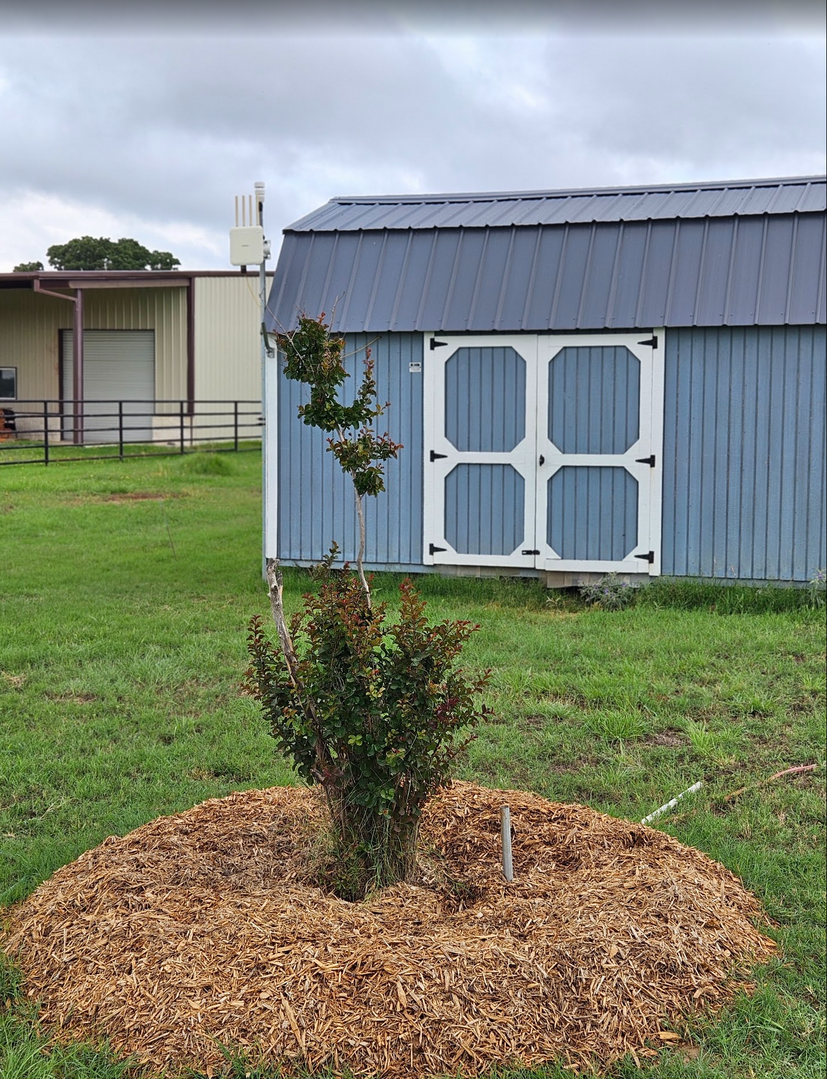
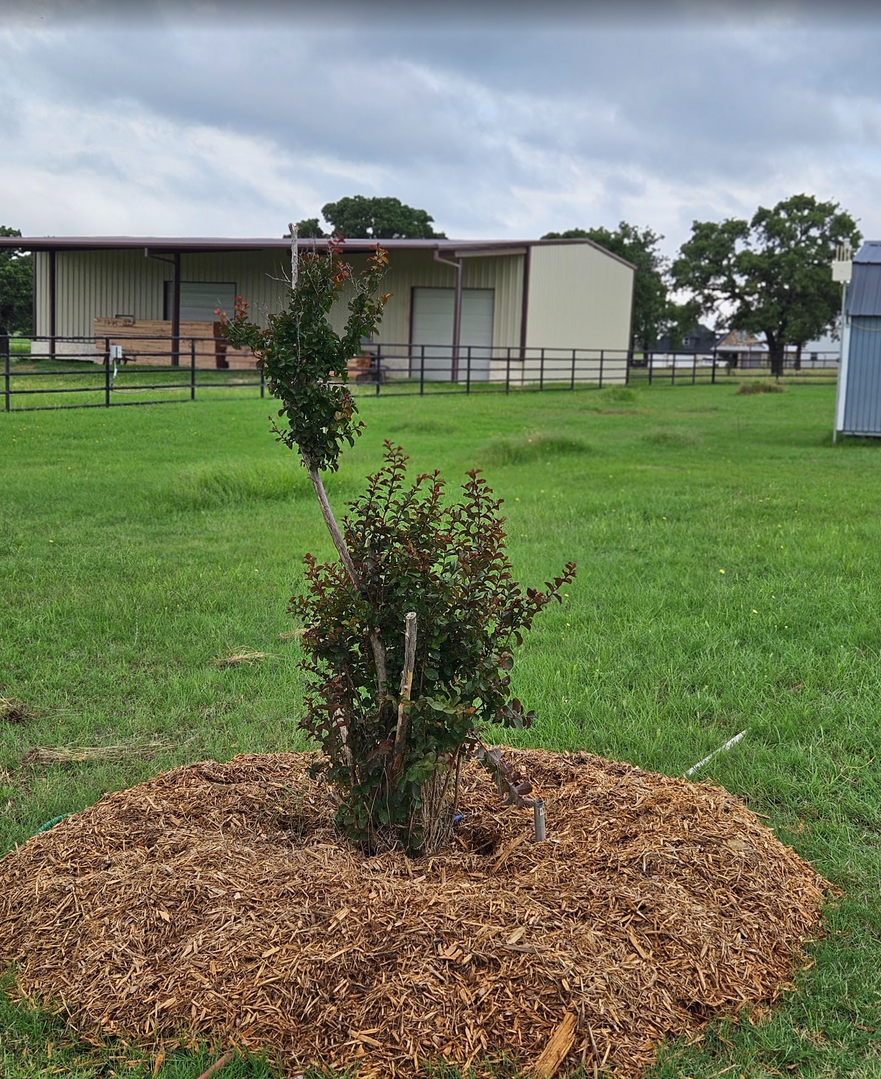
The real answer turns out to be quite simple according to the TX Ag extension. As a rule of thumb you will be safe using one gallon of water for every gallon of the container the tree was de-potted prior to delivery. In my case, my 95 gal trees needed 95 gallons every other day. Remember this is a new tree and needs to recover and re-establish their root systems. The other “key” also from TX Ag ext; water every three days for the FIRST CALENDAR YEAR. As the weather allows during the winter, but at least once every two weeks. This is also only for North Central Texas. I would suggest contacting your local extension for their suggestion in your area.
My total tree count is 13. 10 that are 100% healthy and the 3 remaining root ball for the survivors that I moved to the top of the hill.
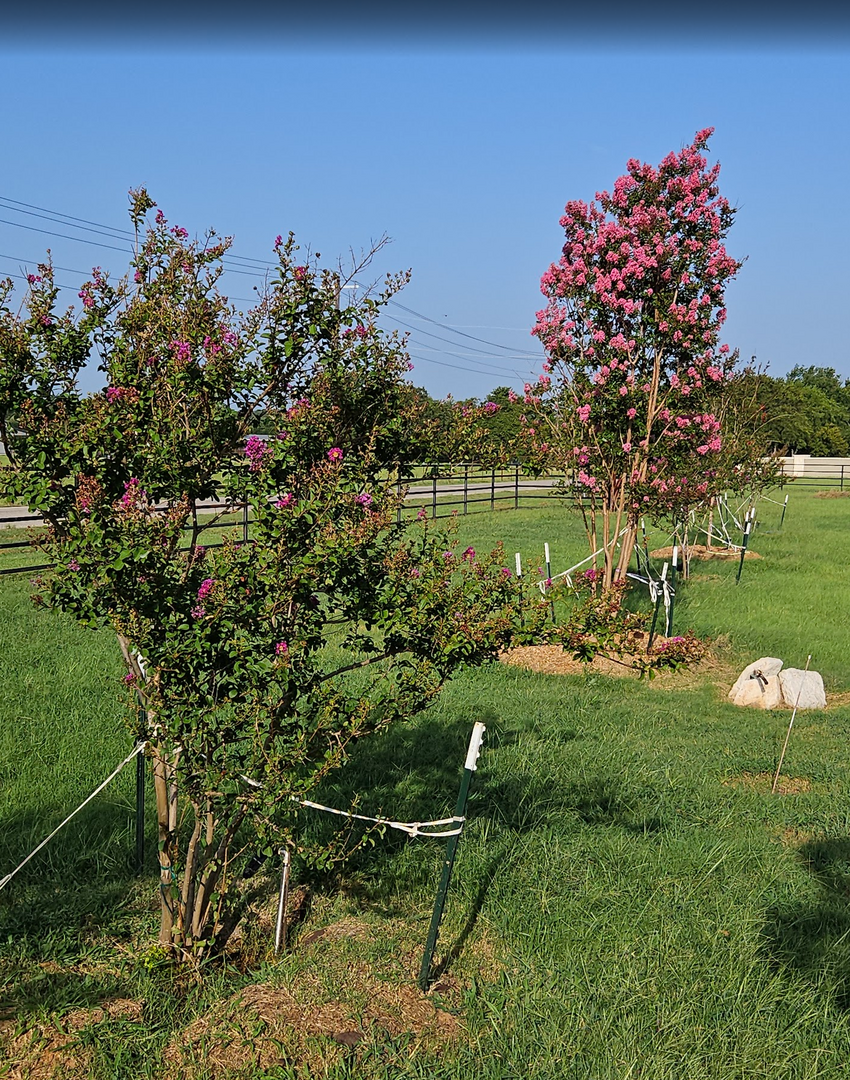
2023 – (3 @ 95 gal) Dynamite Red Crape Myrtle, (now surviving as shrubs, see photos above)
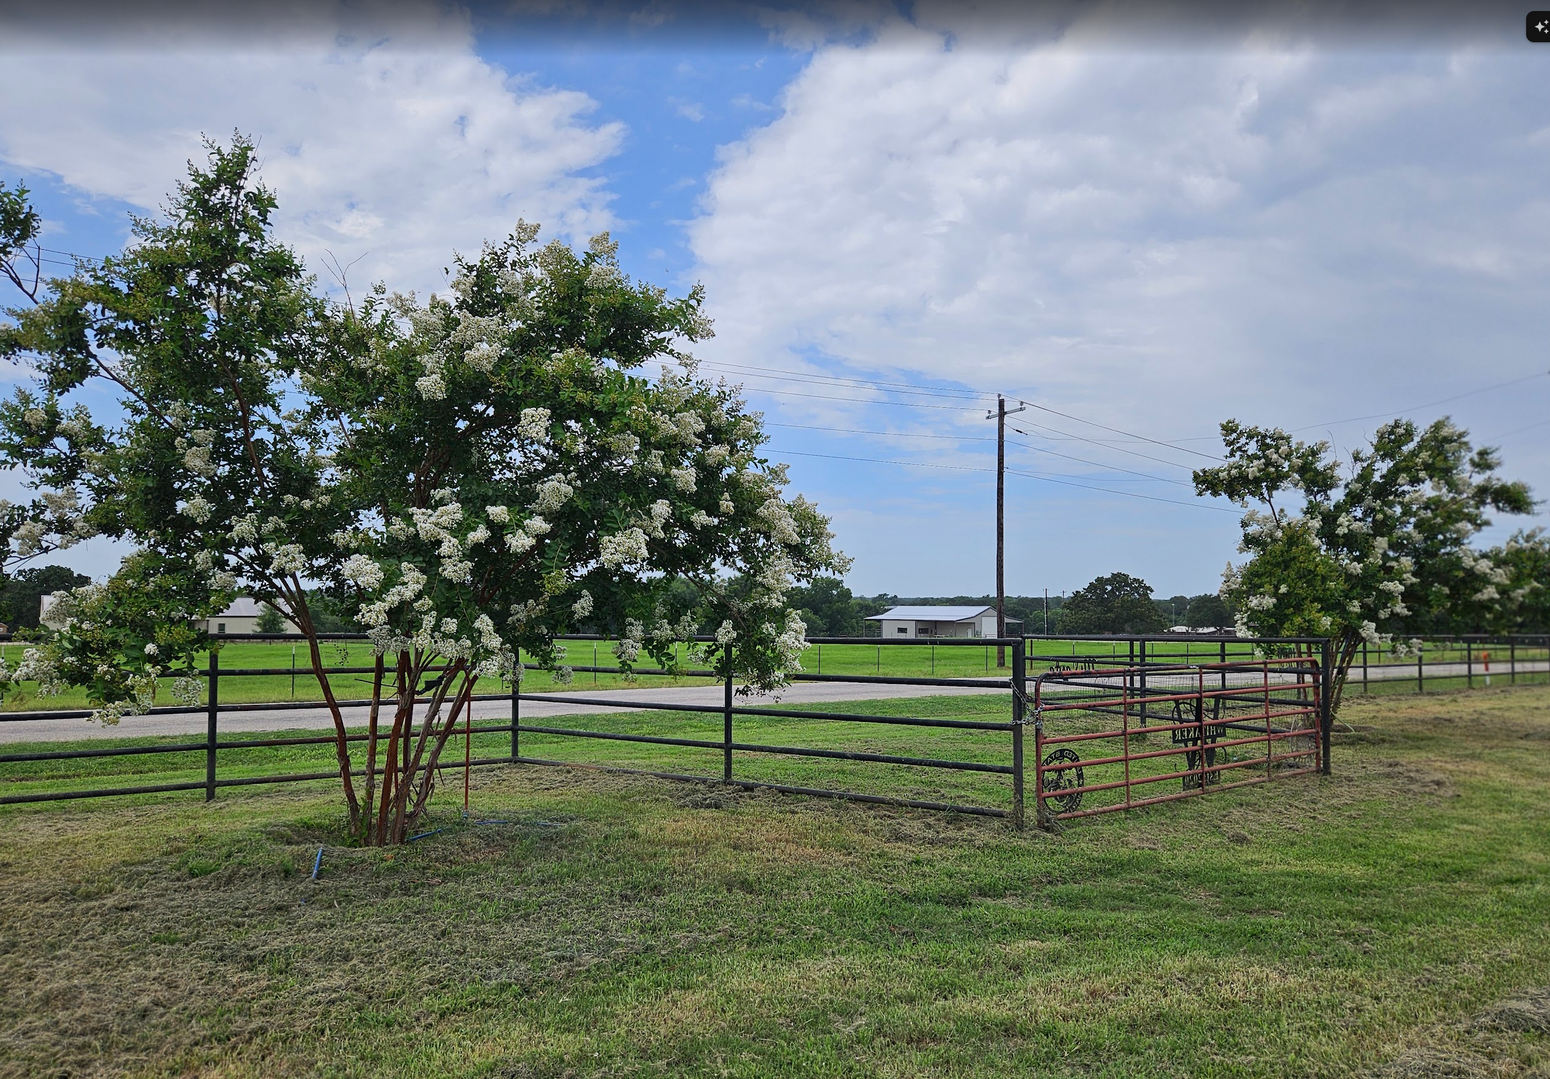
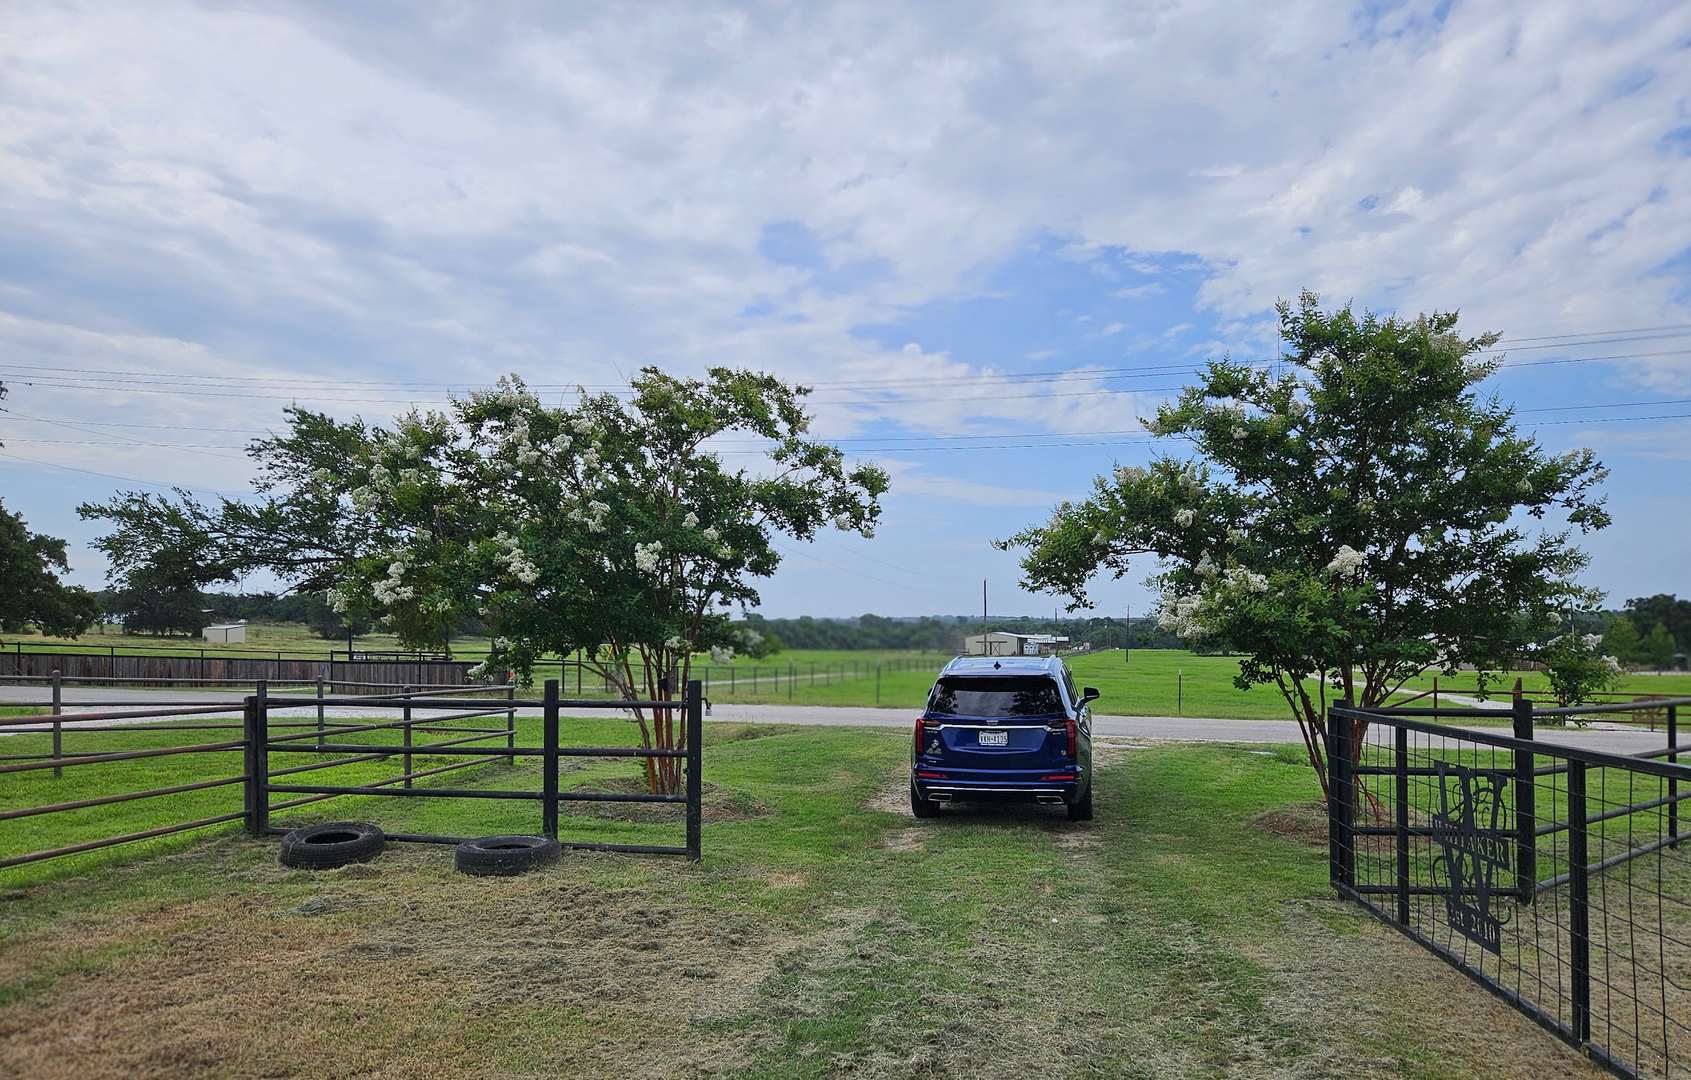
2024 – (3 @ 95 gal) Natchez White Crape Myrtles
This is a 2026 view of the western gate pair:
This is the pair on the eastern gate:
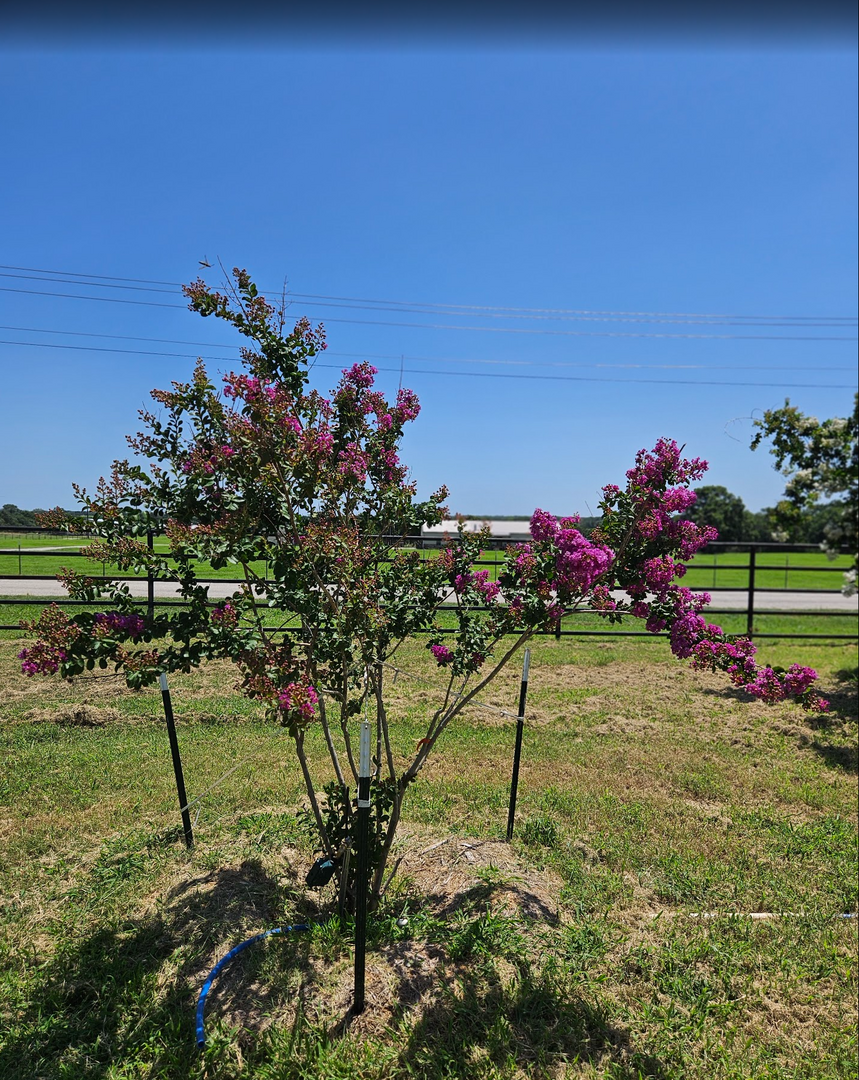
2025 – (3 @ 65 gal) Purple Catawba Crape Myrtles
2026 view (pardon the thumb.... lol)

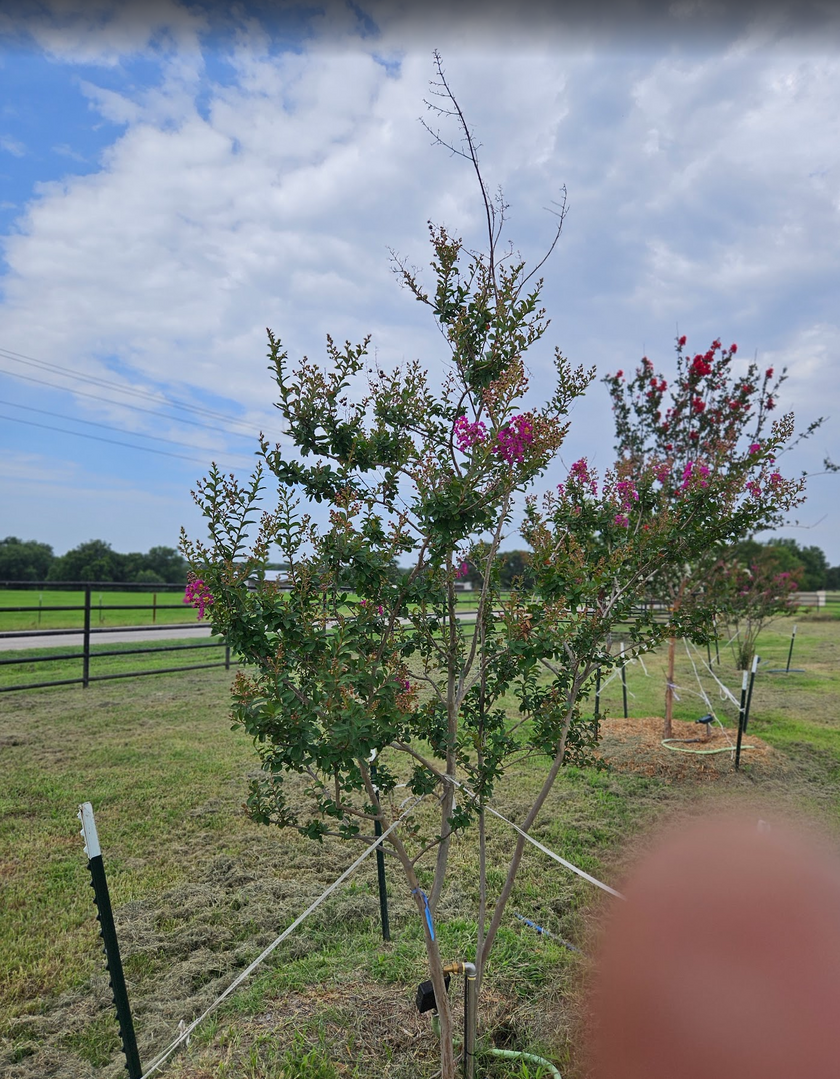
2026 – (2 @ 95 gal) Deep Red Miss Francis Crape Myrtles
These are the newest additions. I decided to mix multi-stalk and a showy single stalk.
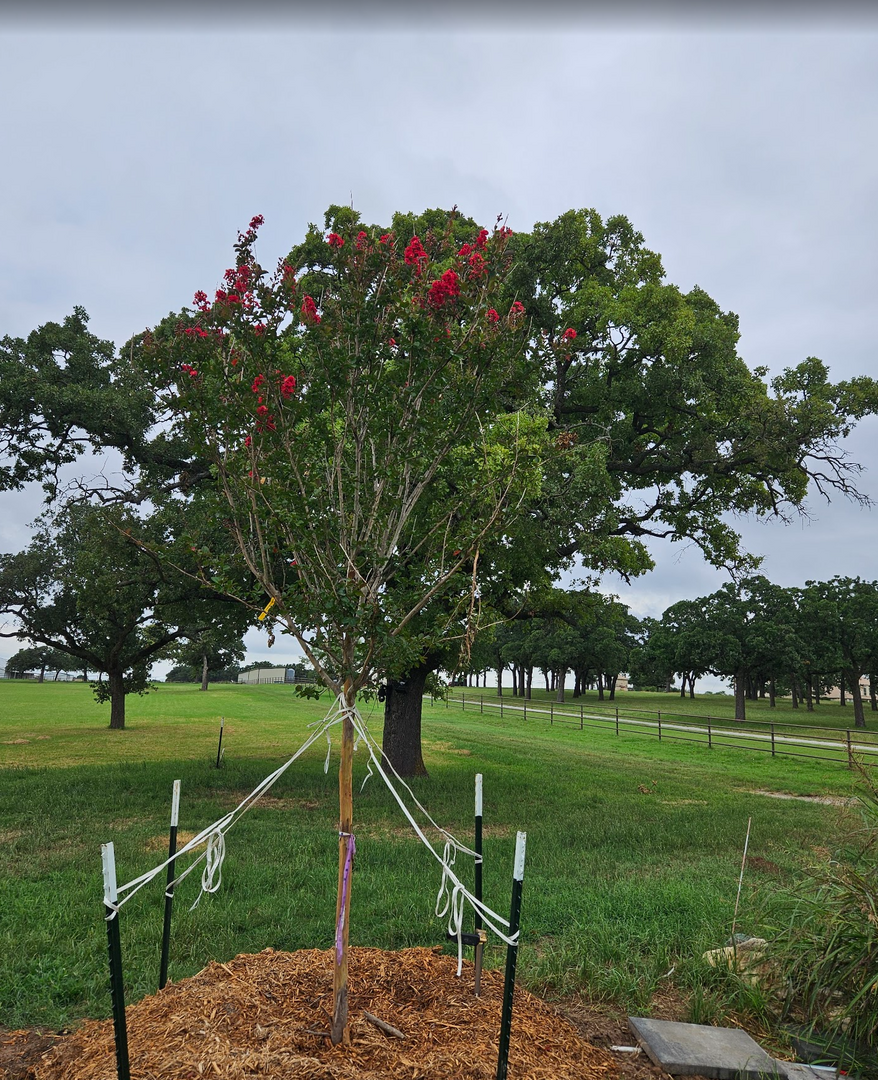



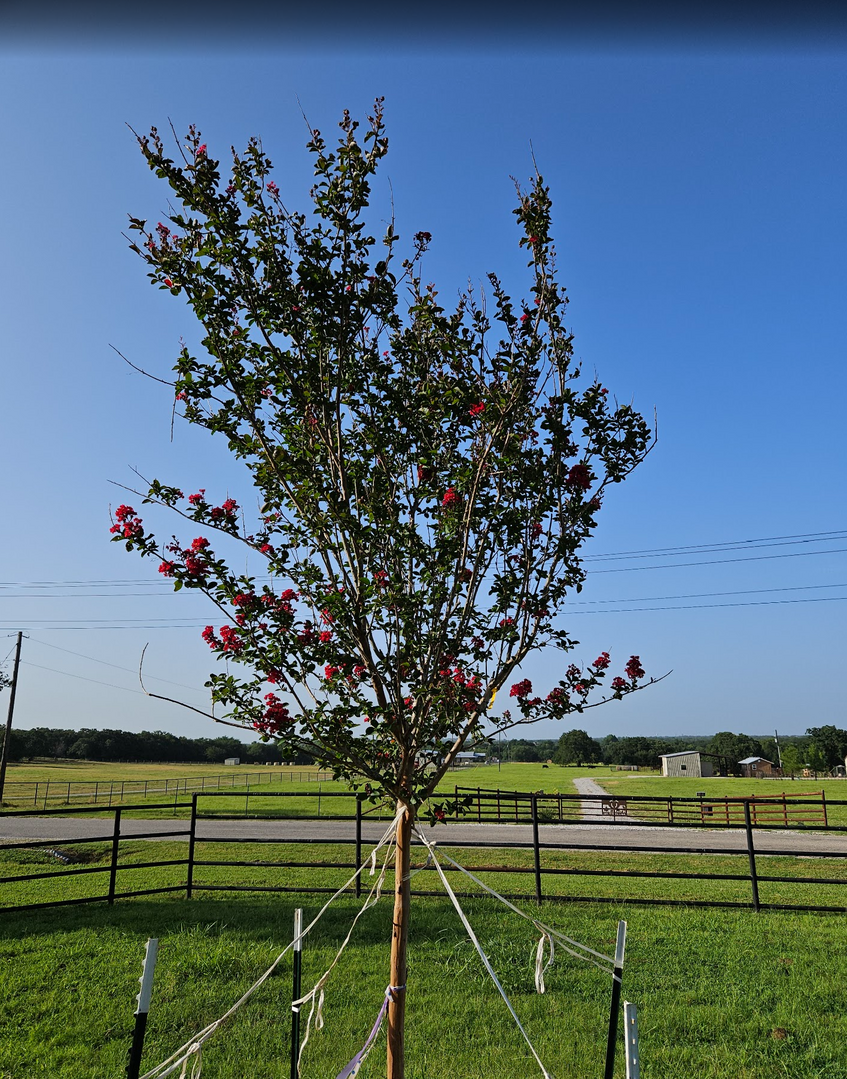
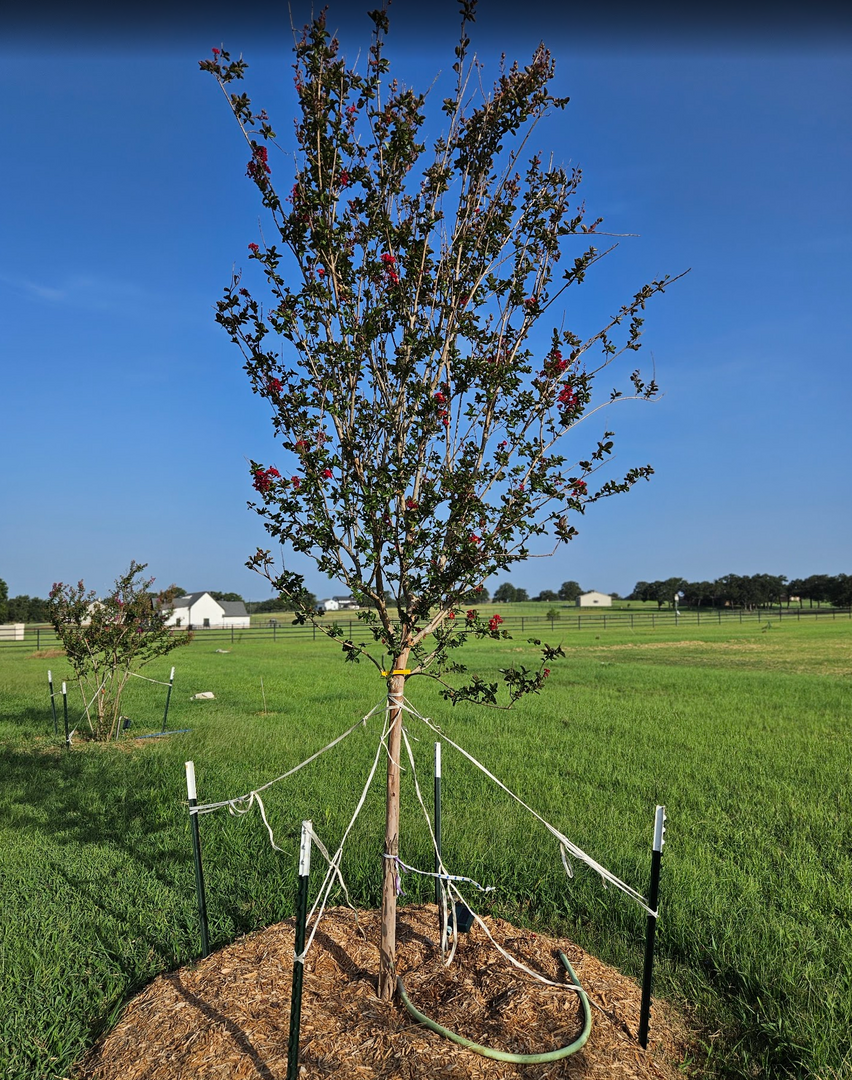
2026 – (1 @ 95 gal) Pink Sioux Crape Myrtle

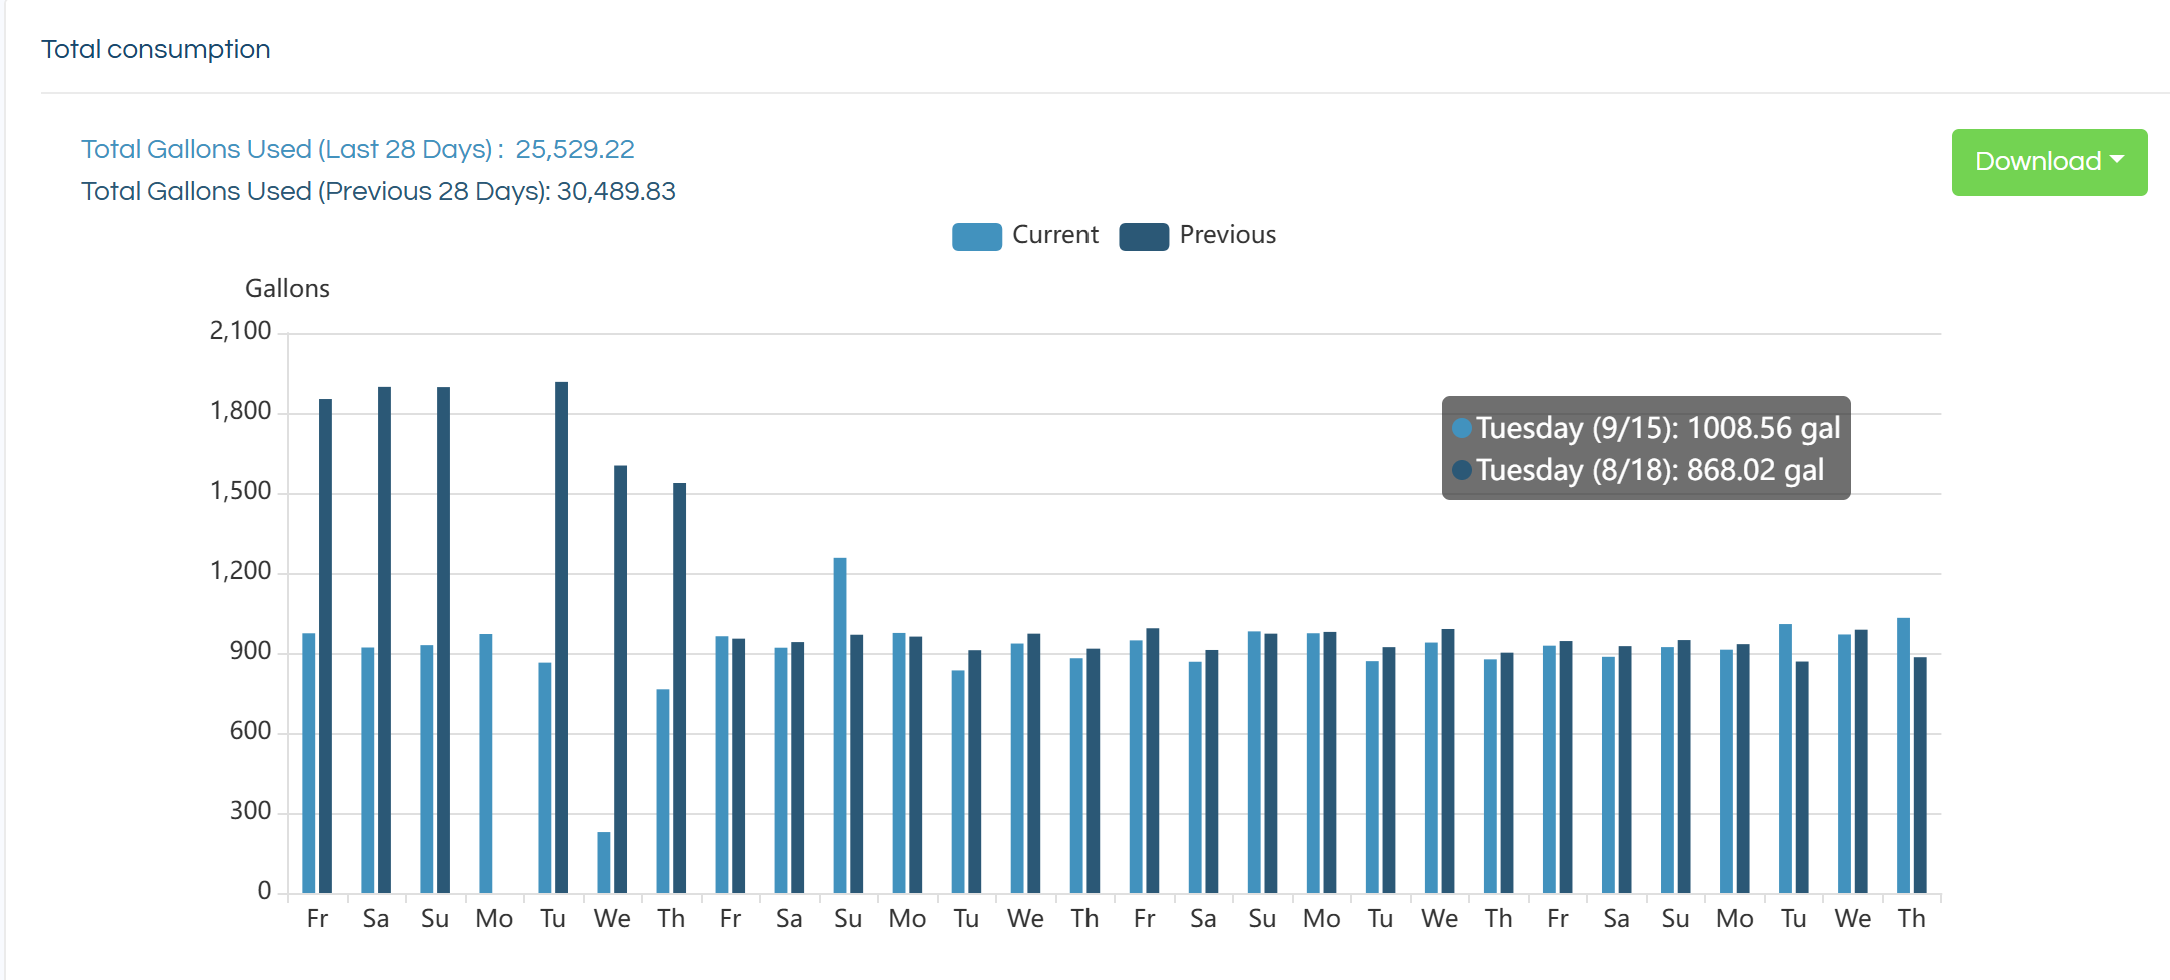
I am watering 3 hours a night with half of the group on each cycle. That keeps my refill time down to three hours AND a timer won’t let refill begin at 0600 On average I am just under 1000 gallons a night (including sprinklers).
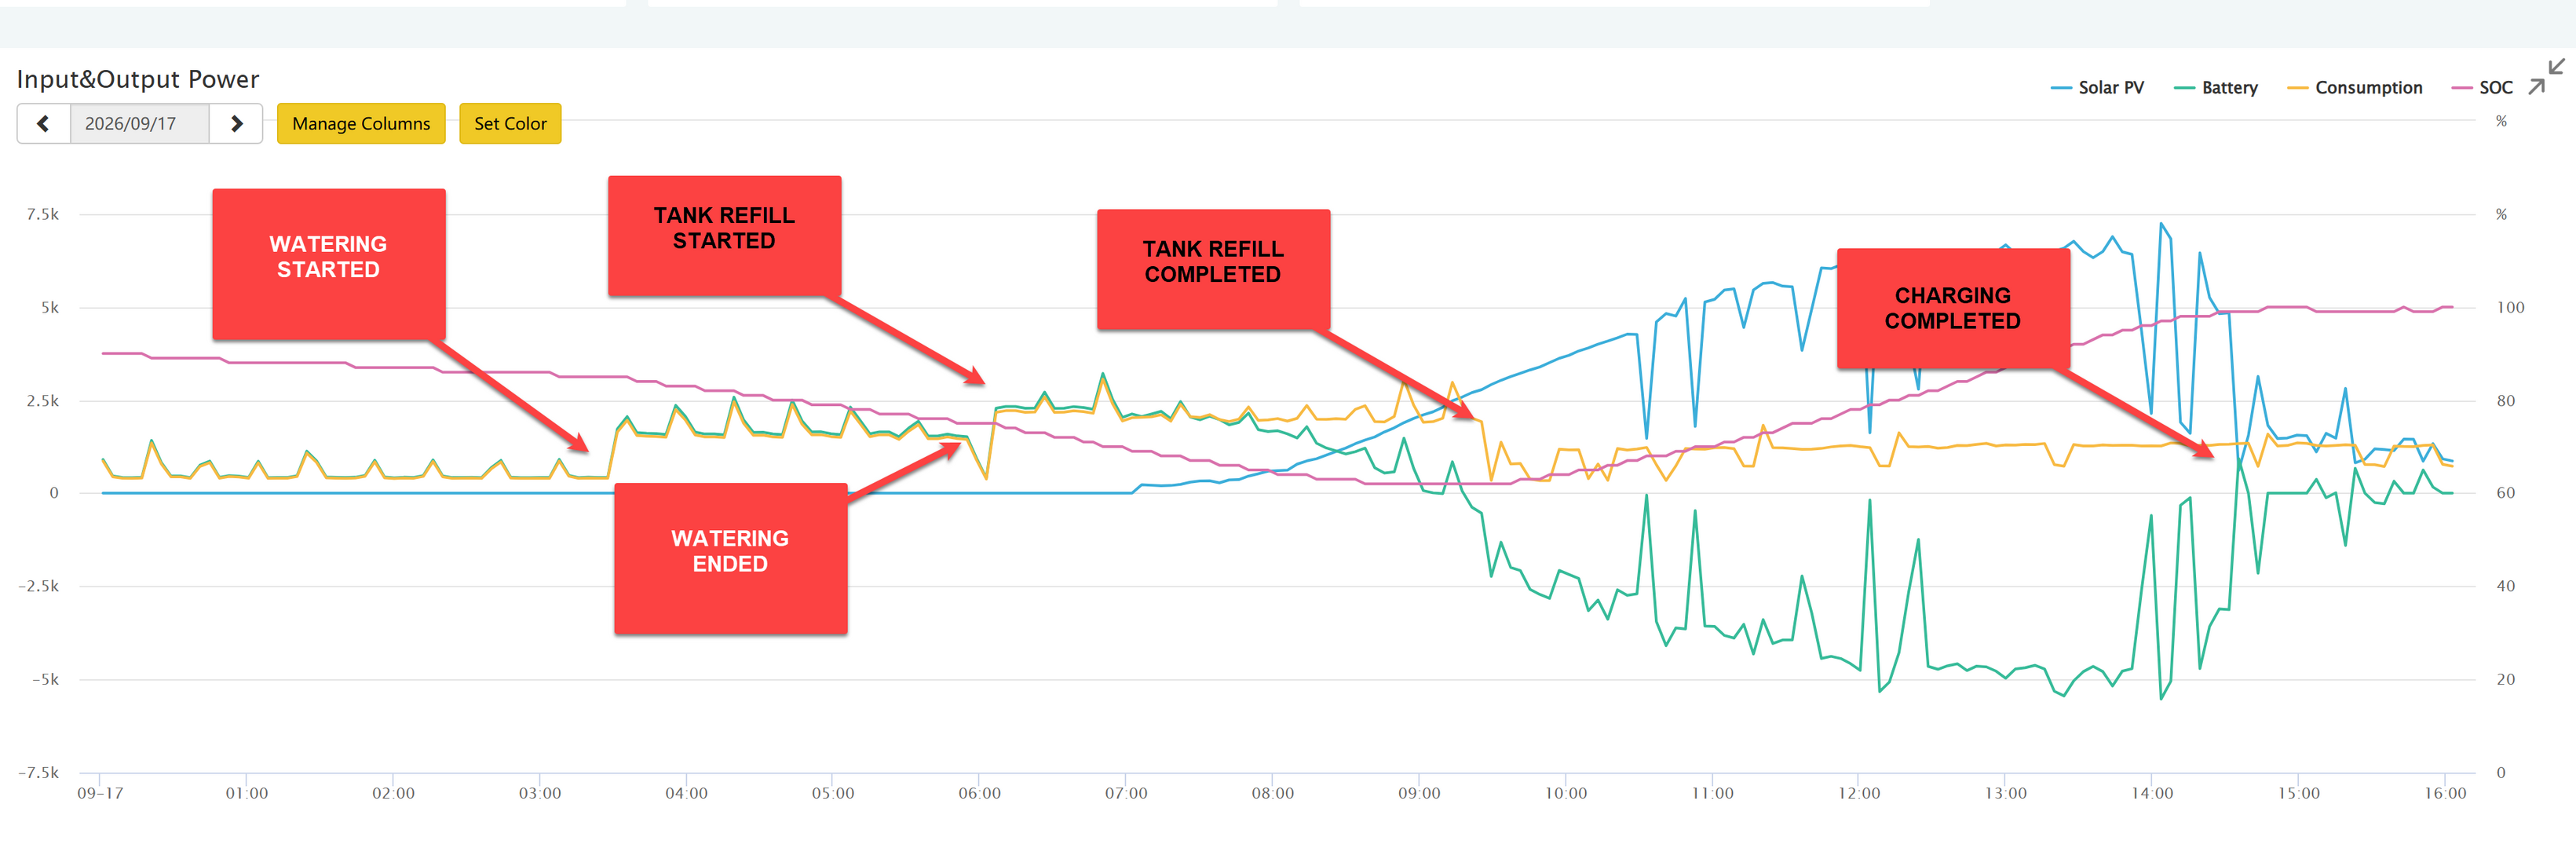
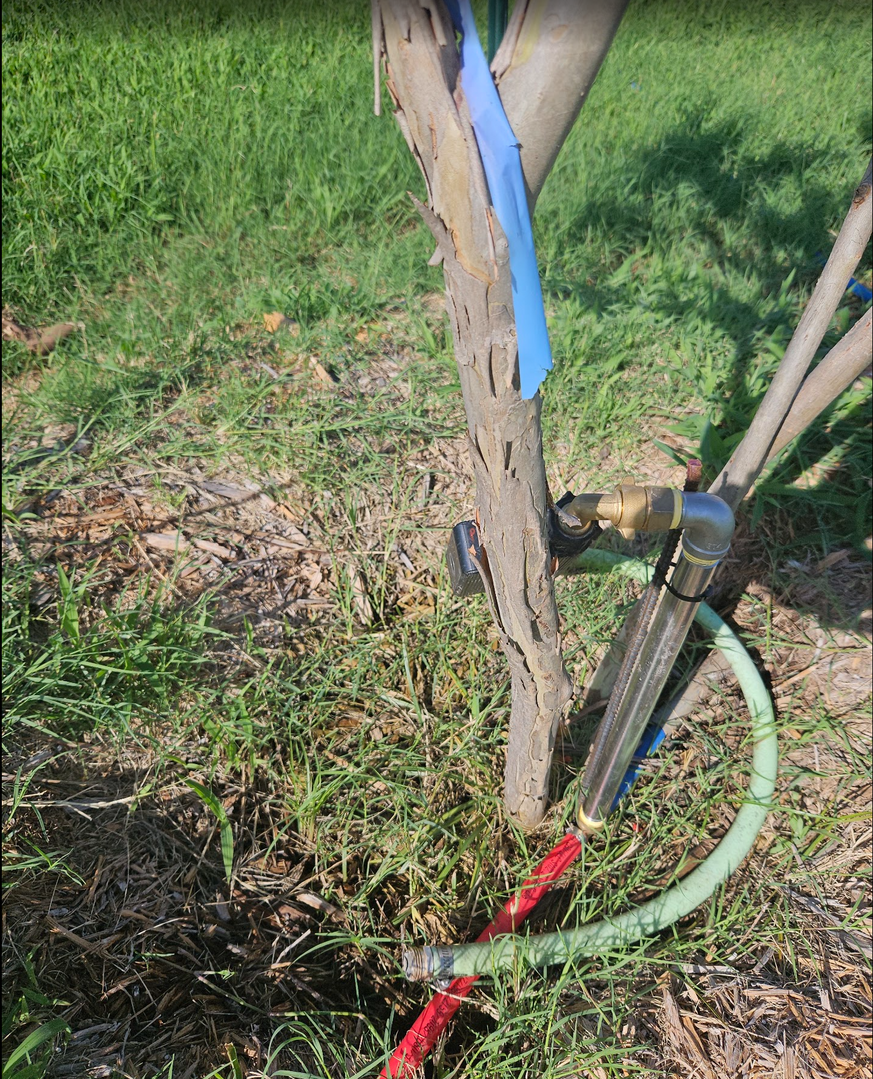
The biggest change for this year was the permanent installation of the watering system. I enclosed the water line inside alum. EMT and paid to have it buried. Then used SS & brass to make the attachment at each tree along with solar timer.
Ok, That is enough for this post. I'll be back....
Love, Peace & Soooooouuuuuuulllllllllll (if you are old enough you'll know; 🙂 )
This post was modified 1 month ago 2 times by dfwtinker
Topic starter
September 19, 2026 2:39 pm
I forgot somebody...
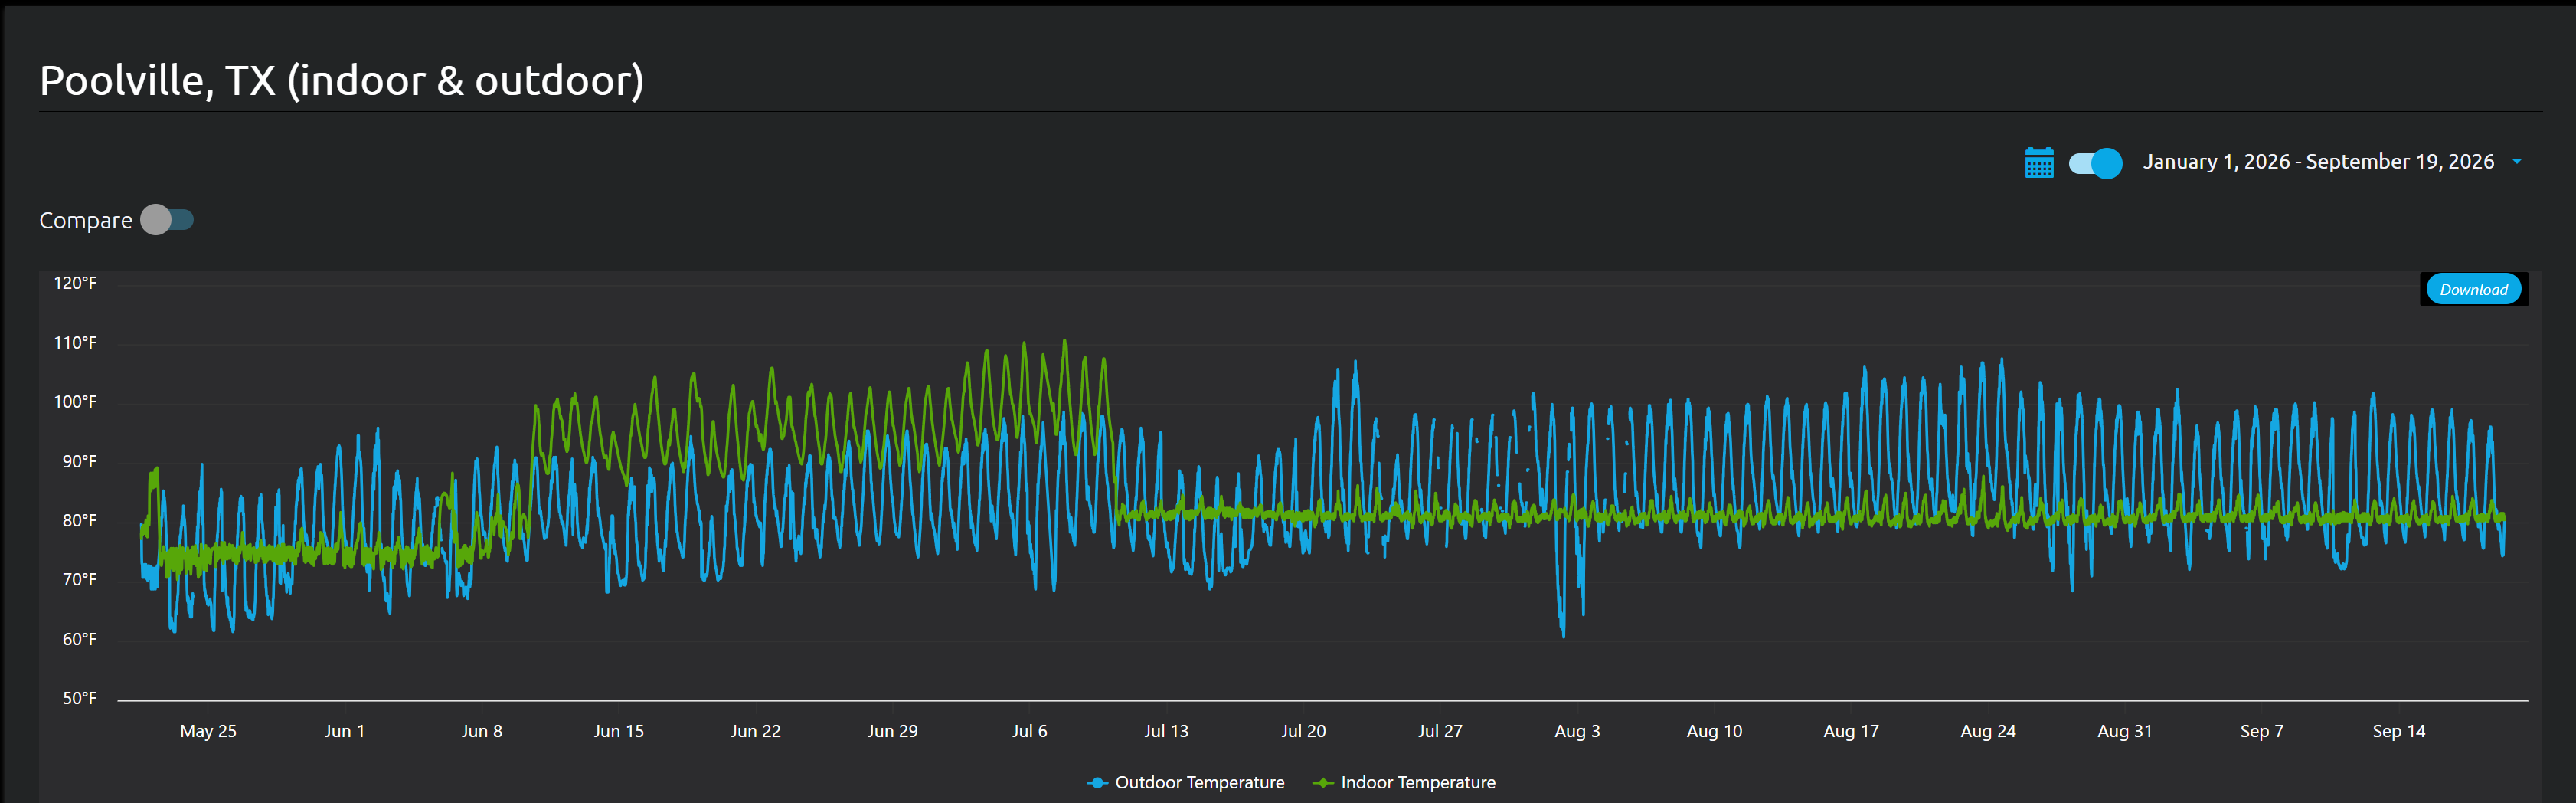
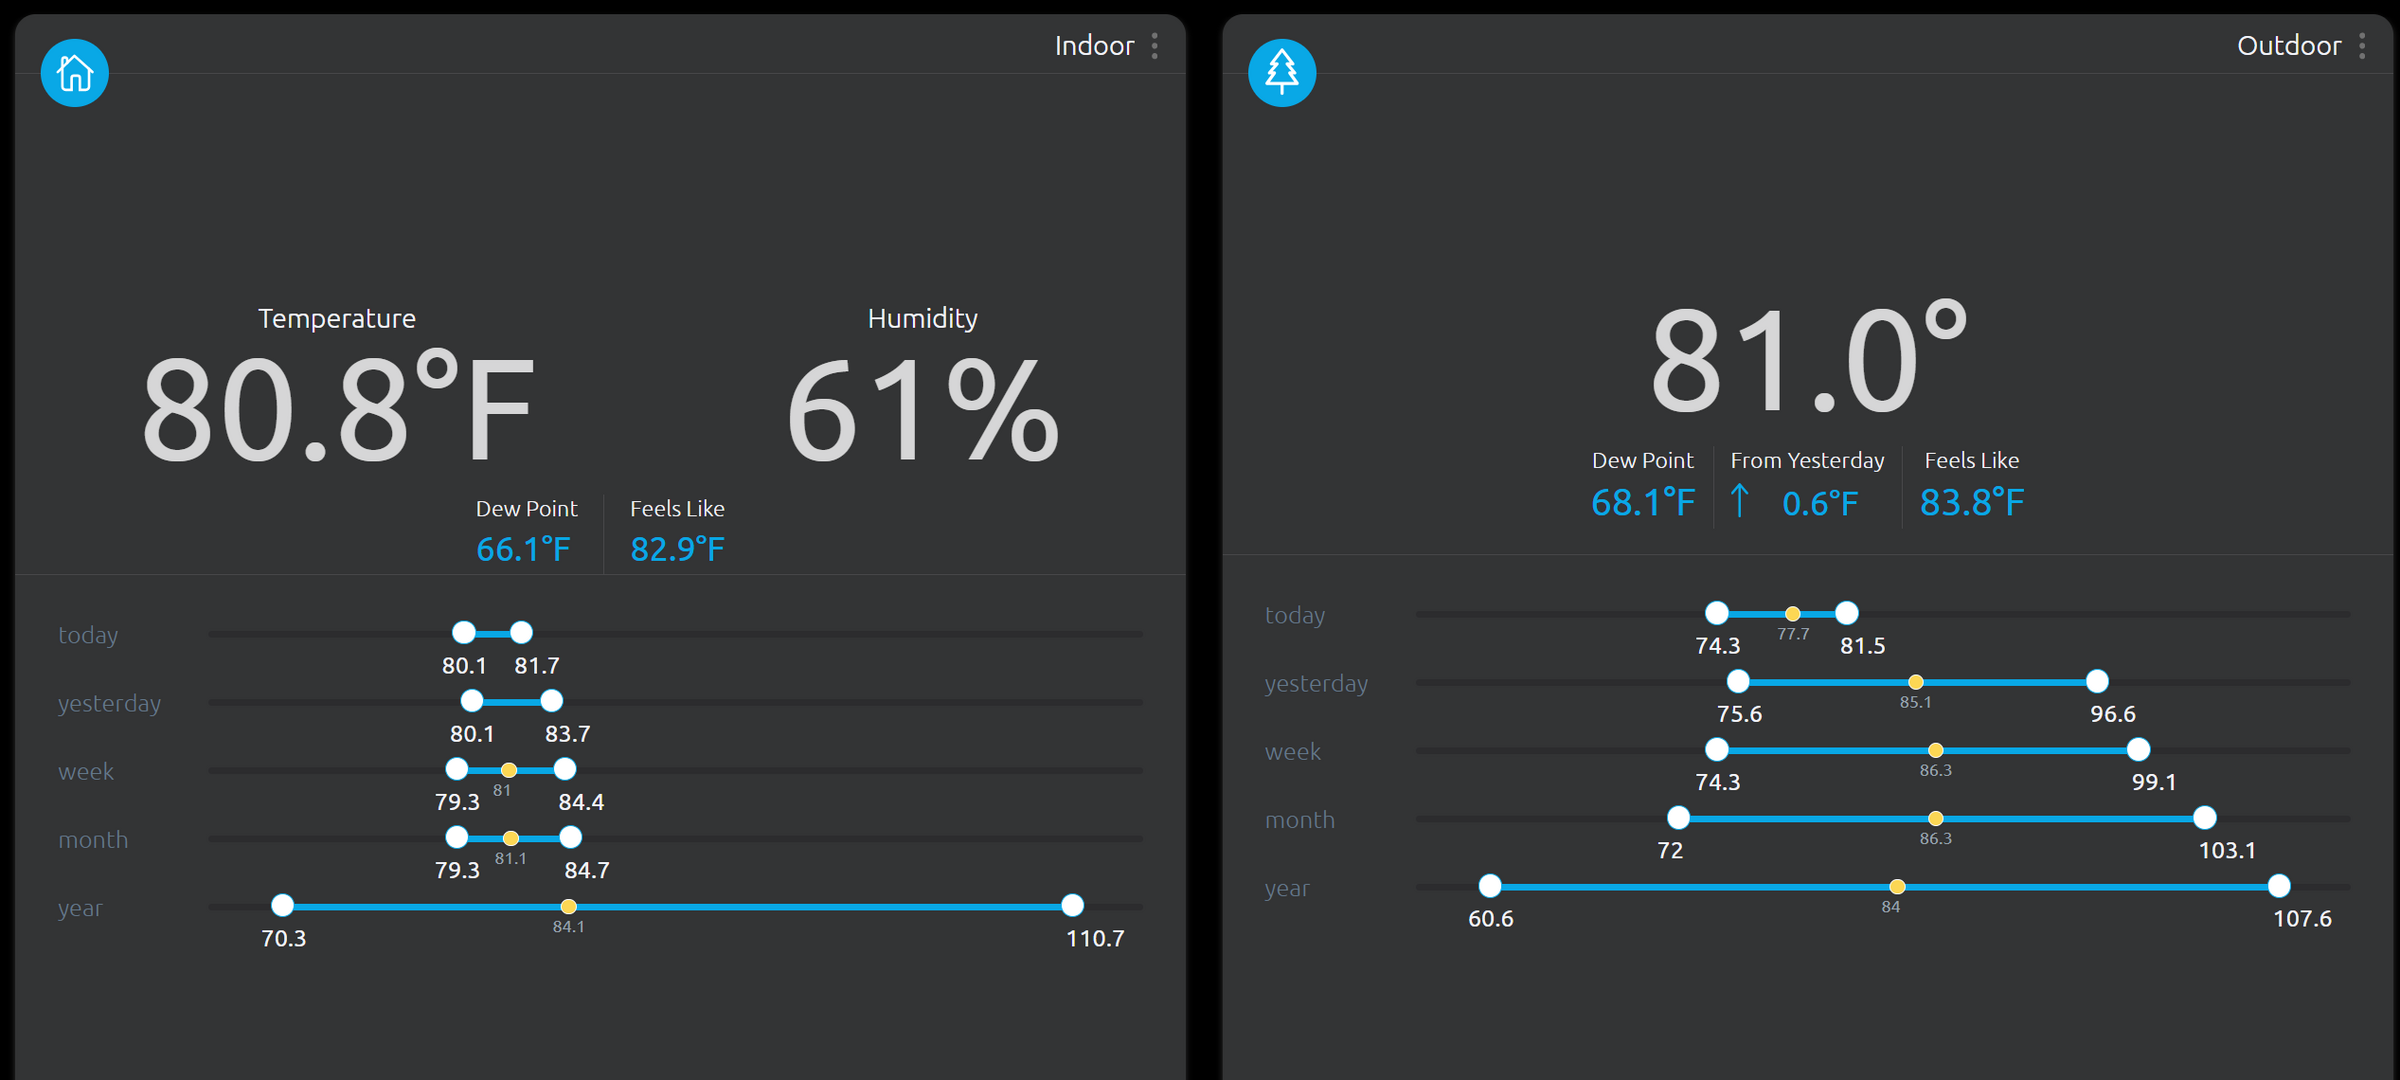
I was asked about the condition of the 24k mini-split.
It has been running non-stop since install almost 3 months ago. Lets hope it stays that way.
Topic starter
October 18, 2026 7:21 am
📋 CKW POWER EMERGENCY BACKUP PLAN
It's cheaper and more flexible than a propane backup and the ROI is MUCH quicker!
Especially if I wire the 6000XP to an essential outlet breaker box (been running the numbers for about 3 weeks).
4 Days in 2021 and 3 Days this past Summer (along with numerous ups & downs playing havoc on my 18 drive SAN).
Stick a fork in me; I'm DONE! ... but I live in Texas so buckle up, buttercup!
*** What isn't mentioned in this plan is the fact that I will be buying a new 12000XP for the Property in Parker County and the existing 6000xp will enter early retirement!
There will be a LOT of details to come, equipment choices etc. I'm sure I'll screw something up! So stay tuned. This is the plan TODAY anyway.
System Profile: (2x) Dual EcoFlow DELTA 3 Ultra Plus Cross-House Backup
Central Power Vault: (8x) WattCycle WT48V100AH100RACK-3UBT (40.96 kWh Total)
Future Infrastructure (Spring/Summer): EG4 6000XP Dedicated Off-Grid Inverter Upgrade
- CENTRAL BATTERY BANK ARCHITECTURE
- Total Combined Storage Capacity: 40,960 Wh (40.96 kWh) from the 8-bay rack cabinet, plus 3,072 Wh internally inside each EcoFlow unit, yielding a system total of 47,104 Wh (47.1 kWh).
- Wiring Topology: All 8 WattCycle 100Ah modules must be wired in a single parallel group utilizing equal-length high-flex stranded battery cables routing directly into common industrial negative and positive busbars.
- Operational Lifespan Management: With an emergency backup load draw of approximately 400W–1,000W, the inverter/adapters will pull roughly 5A or less from each battery module. This low current minimizes structural cell heating and ensures maximum cycle efficiency.
- DUAL CROSS-HOUSE DC DISTRIBUTION
- Line Balance Rule: The two 8 AWG pure stranded copper WattLINK cables running from the centralized vault out to the opposite ends of the house must be cut to the exact same physical length. This ensures identical electrical resistance and prevents one EcoFlow station from unevenly loading or drawing down the bank.
- Isolation Breakers: Each positive (+) 8 AWG leg exiting the common cabinet busbar must route directly through a 50 Amp Eaton Bussmann Series 187 Marine Rated Surface-Mount Circuit Breaker (Part Number: CB187F-50 or 187050F-03-1).
- Cabinet Enclosure Mounting: The Bussmann Series 187 breaker features a fully non-conductive, self-insulating thermoset plastic (phenolic) housing. It requires no rubber or phenolic isolation sheets and can be screwed directly onto the raw or painted metal exterior of the battery cabinet.
- Terminal Protection: Protective rubber insulation boots must be installed over the 5/16" (M8) exposed breaker terminals to eliminate short-circuit risks from dropped tools against the cabinet chassis.
- RUNTIME EXPECTATIONS & CRITICAL PARAMETERS
- Winter Mode Configuration (Estimated Load: ~400W–500W)
- Appliance Loadout: 1x Standard Refrigerator, 50-ft Pipe Heat Tape, 1–2 Low-Voltage Electric Heated Blankets.
- System Autonomy: ~88 Hours (~3.6 Days) of continuous runtime with zero recharging.
- Summer Mode Configuration (Estimated Load: ~800W–1,000W)
- Appliance Loadout: 1x Standard Refrigerator, 1x Small Eco-Mode Portable A/C.
- System Autonomy: ~44 Hours (~1.8 Days) under aggressive continuous cooling cycles.
- Thermal Protection Warning: LiFePO4 cells cannot accept a charge if internal temperatures drop below 32°F (0°C). The central rack vault must be located inside an insulated or heated space (e.g., near the home's gas fireplace) during freezing winter grid events.
- SEQUENCING & COMMISSIONING GUIDE
To prevent live electrical arcs or tripping internal safety relays on the EcoFlow expansion lines, follow this connection sequence:
- Turn the central battery bank master disconnect or cell breakers OFF.
- Trip both exterior Bussmann cabinet breakers to the OFF (open manual arm) position.
- Fully charge the DELTA 3 Ultra Plus stations via utility power to 100%. Fully charge the WattCycle central bank to 100% so all system voltages match perfectly.
- Bolt the WattLINK M8 ring terminals securely to the fused side of the Bussmann breakers.
- Securely map the XT150 cables to the EcoFlow Extra Battery Expansion Adapters, and lock the multi-pin blocks into the back of both DELTA 3 Ultra Plus
- Flip both Bussmann 187 breaker arms to the ON position to safely introduce the synchronized DC power paths.
-
-
- NEXT-SUMMER RETIREMENT UPGRADE: EG4 6000XP
-
When transitioning this system to a unified off-grid backup next summer, replace the EcoFlow links with the retired EG4 6000XP Inverter configured manually as follows:
- Battery Configuration Type (Setting 05): Set to USE (User-Defined Voltage) to operate in an open-loop profile.
- Bulk/Absorption Charge Voltage (Setting 12): Program to 0V.
- Float Charge Voltage (Setting 13): Program to 0V.
- Low DC Cut-Off Disconnect (Setting 14): Program to 0V to preserve an operational safety window.
- AC Input Charger Current: Set up to a maximum of 120A continuous, which will completely reload the empty 40.96 kWh bank from utility or city infrastructure in roughly 7 to 8 hours.
This post was modified 3 days ago 2 times by dfwtinker
Page 4 / 4
Prev
